
L300 V6-3.0L VIN R (2001)
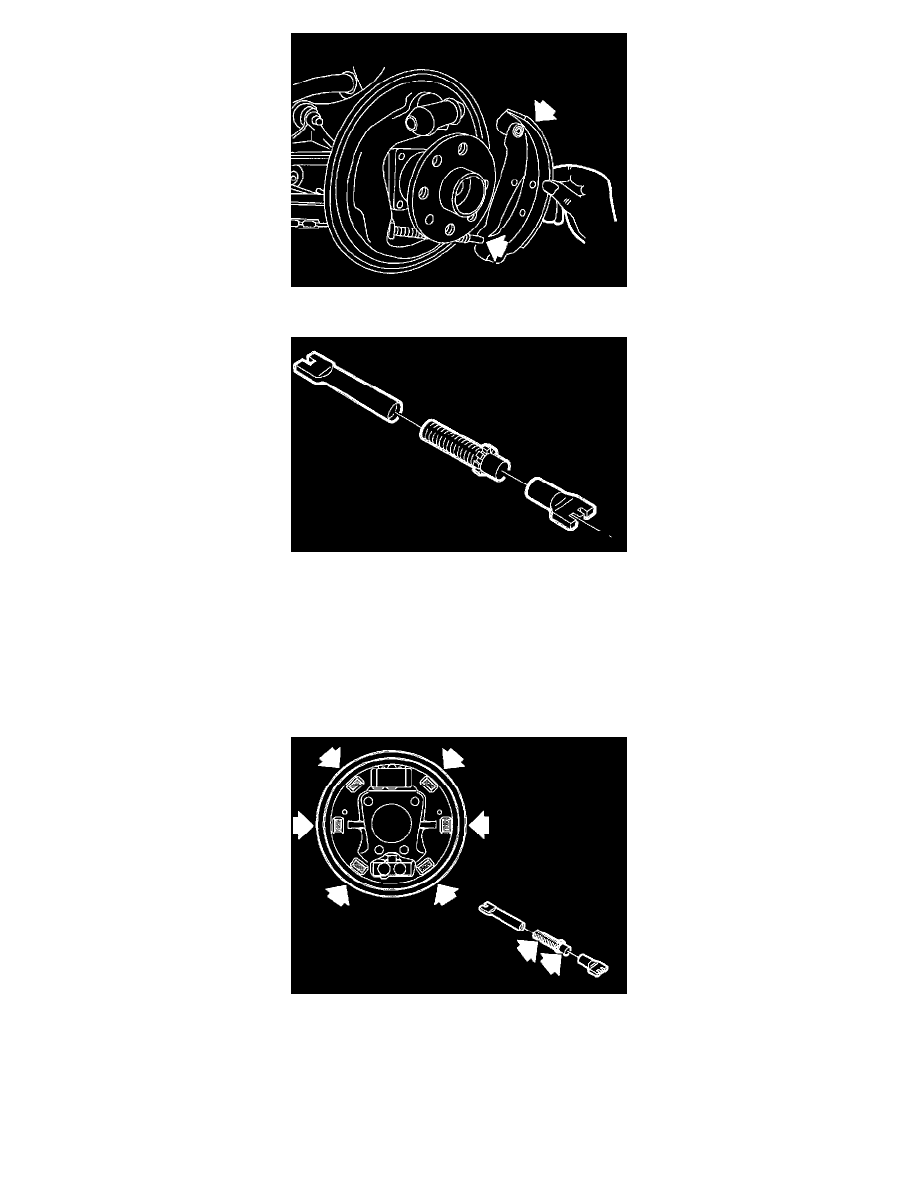
11. Remove leading (front) brake shoe and trailing (rear) brake shoe from park brake cable.
12. Disassemble brake adjuster components: adjusting socket, screw, clip, and nut.
13. Clean adjusting socket, screw, and nut in clean denatured alcohol.
14. Inspect adjuster assembly, making sure that adjuster screw threads smoothly into adjusting nut, over full threaded length.
NOTICE: If wheel cylinder is found to be damaged, replace it. Do not attempt to repair wheel cylinder.
15. Inspect wheel cylinder for leakage, cuts or damaged boots. Also, make sure that wheel cylinder is not seized.
ASSEMBLY
IMPORTANT: When replacing rear brake shoes, inspect backing plate for excessive wear at six raised shoe contact pads. Excessive wear at raised
shoe contact pads, such as notches or deep grooves, could impede shoe travel. Never replace brake pads on one side of axle only. Left and right side
brake pads must be replaced only as axle sets.
1. Lubricate the following components:
^
Adjuster lever surfaces that rub on brake shoe web.
^
Backing plate at the six raised shoe contact pads.
2. Install park brake cable to park brake lever of trailing (rear) brake shoe.