LW2 V6-3.0L VIN R (2000)

2.
Disconnect negative battery cable.
3.
Cut damaged wire(s) at location of chafe or pinch.
4.
Remove insulation from both ends of cut wire. Recommended strip length is 9.5 mm (3/8 in.). Caution must be used when stripping wire to
prevent cutting wire strands. Locate new splice a minimum of 40 mm (1.5 in.) from other splices.
IMPORTANT:
With wiring used in Saturn vehicles, it is recommended that approved Packard Crimp and Seal Splice Sleeves (or equivalent) be used.
5.
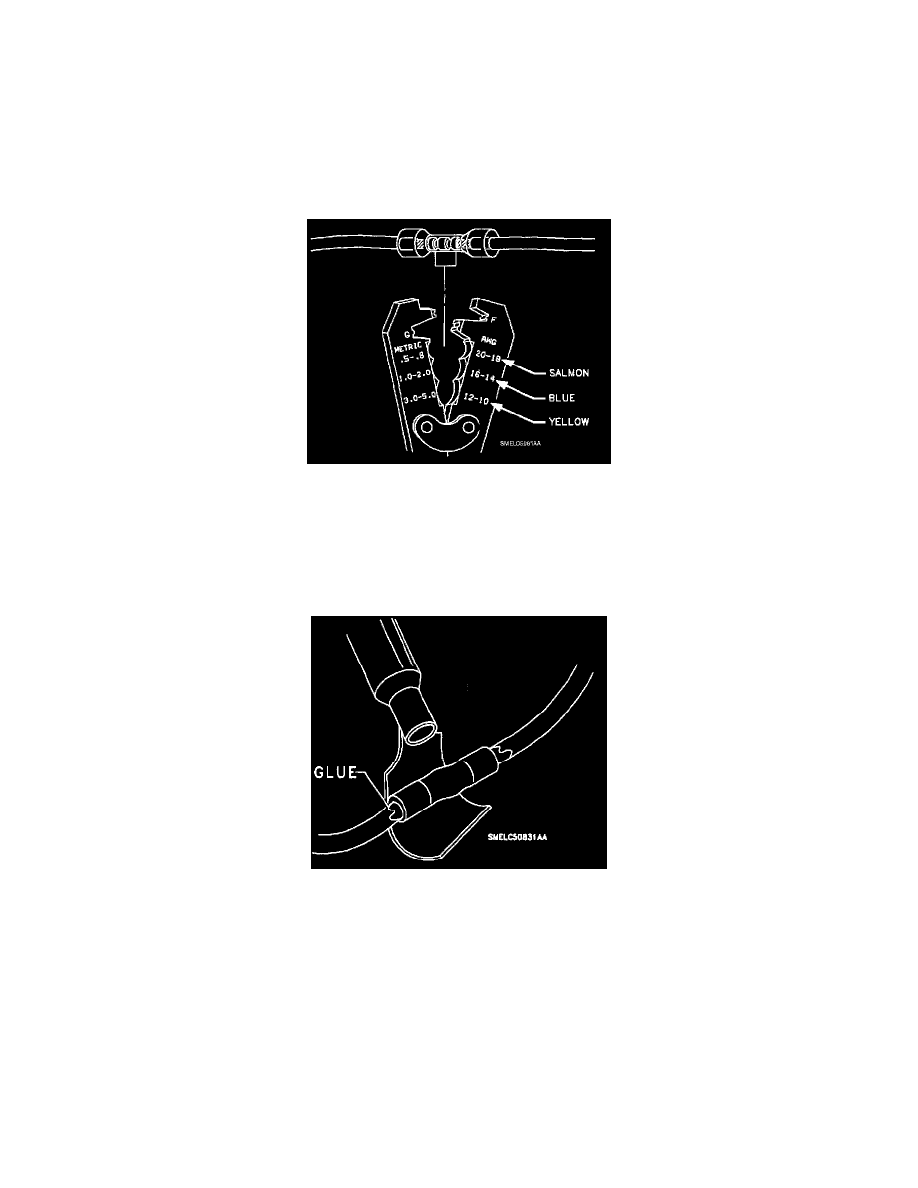
Using Saturn approved crimp and seal splice sleeve (found in special tools kit SA9138Z), position stripped ends of wires in sleeve until wires hit
stop.
6.
Hand crimp splice sleeve using appropriate crimping tool. Gently tug on wires after crimping to ensure they are secure.
CAUTION:
DO NOT USE A MATCH OR OPEN FLAME TO APPLY HEAT TO SPLICE SLEEVE.
7.
Apply heat using Ultratourch(R) or equivalent device, heating to 175° C (347° F) until glue flows around edges of sleeve.
8.
Check repaired wire(s) continuity and verify proper repair.
9.
Tape wiring harness with electrical tape to prevent the possibility of future chafing.
10.
Check COOL FAN # 1 fuse located in UHFB to ensure it is not blown.
11.
Connect negative battery cable.
Torque:
Negative Battery Cable Bolt: 17 N.m (13 ft-lbs)
12.
Connect Scan tool to vehicle and turn ignition to RUN position.
