
LW2 V6-3.0L VIN R (2000)
Rear Suspension Support-to-Body
Bolts: 90 N.m (66 ft-lbs) + 90° to 105°
8.
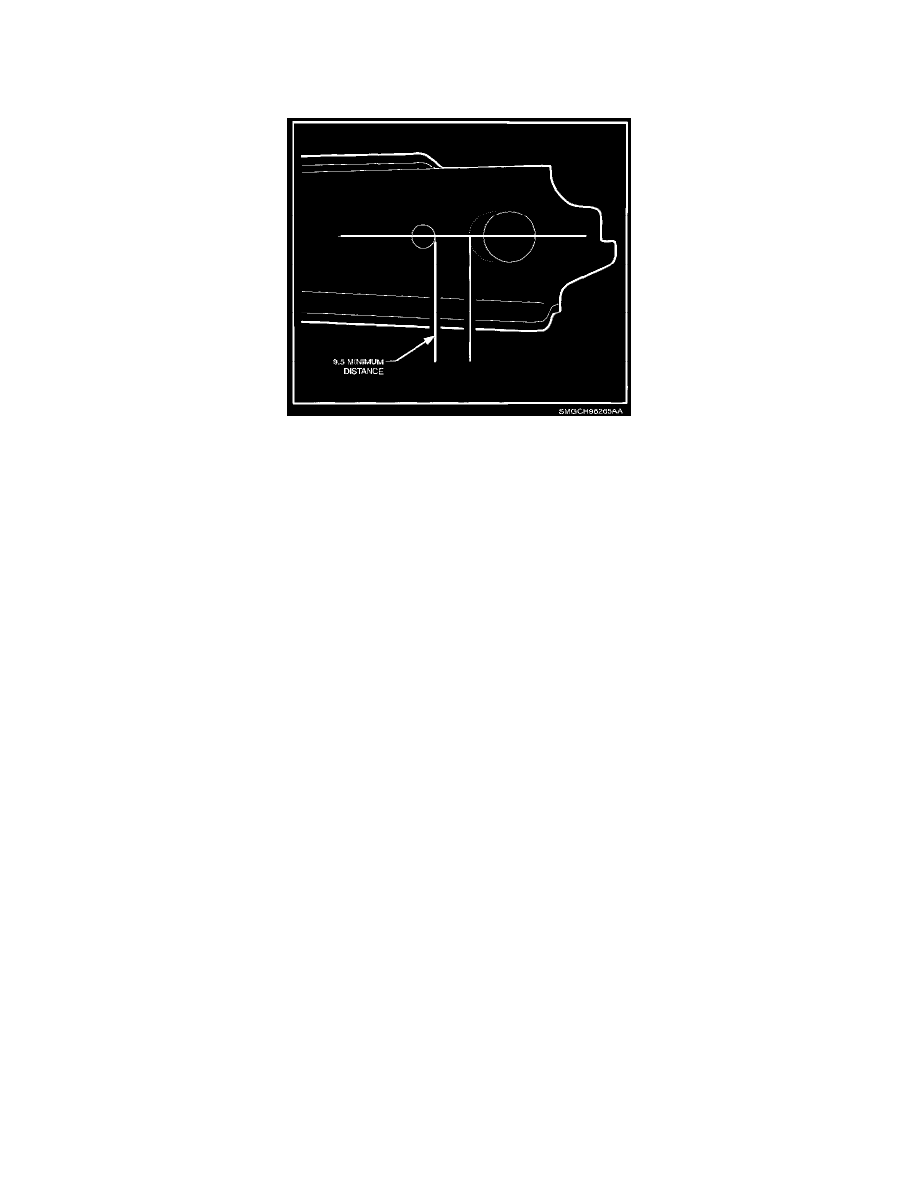
Using a die grinder (or equivalent), remove material from the lower control arm-to-knuckle location to make a slot. Remove material from the
inboard side of the hole to make camber more positive.
IMPORTANT:
The minimum distance between the inside of the slot and the adjacent hole is 9.5 mm.
IMPORTANT:
Paint exposed metal with primer after making slot.
IMPORTANT:
Do not use the control arm nut retainers since they will prevent adjustment of rear Camber.
9.
Using new bolts and new nuts, install lower rear suspension lower control arm to knuckle. Tighten but do not torque at this time.
NOTICE:
Before installing wheels, remove rust or corrosion from wheel mounting surfaces and brake rotors. Failure to do so can cause wheel bolts to loosen in
service.
10.
Position wheel onto hub.
11.
Install wheel bolts and tighten in a star pattern.
11.1 Hand tighten all five wheel bolts.
11.2 Use a torque wrench to tighten wheel bolts using a star pattern.
Torque:
Wheel Bolts (Initial Torque): 63 N.m (46 ft-lbs)
11.3 Use a torque wrench to final tighten wheel bolts using a star pattern.
Torque:
Wheel Bolts (Final Torque): 125 N.m (92 ft-lbs)
12.
Lower vehicle from hoist.
13.
Perform vehicle alignment as specified in the applicable model year L-Series Chassis Service manual using the new steps and specifications
outlined in this bulletin.
Rear Alignment Procedure