
LW2 V6-3.0L VIN R (2000)
6.
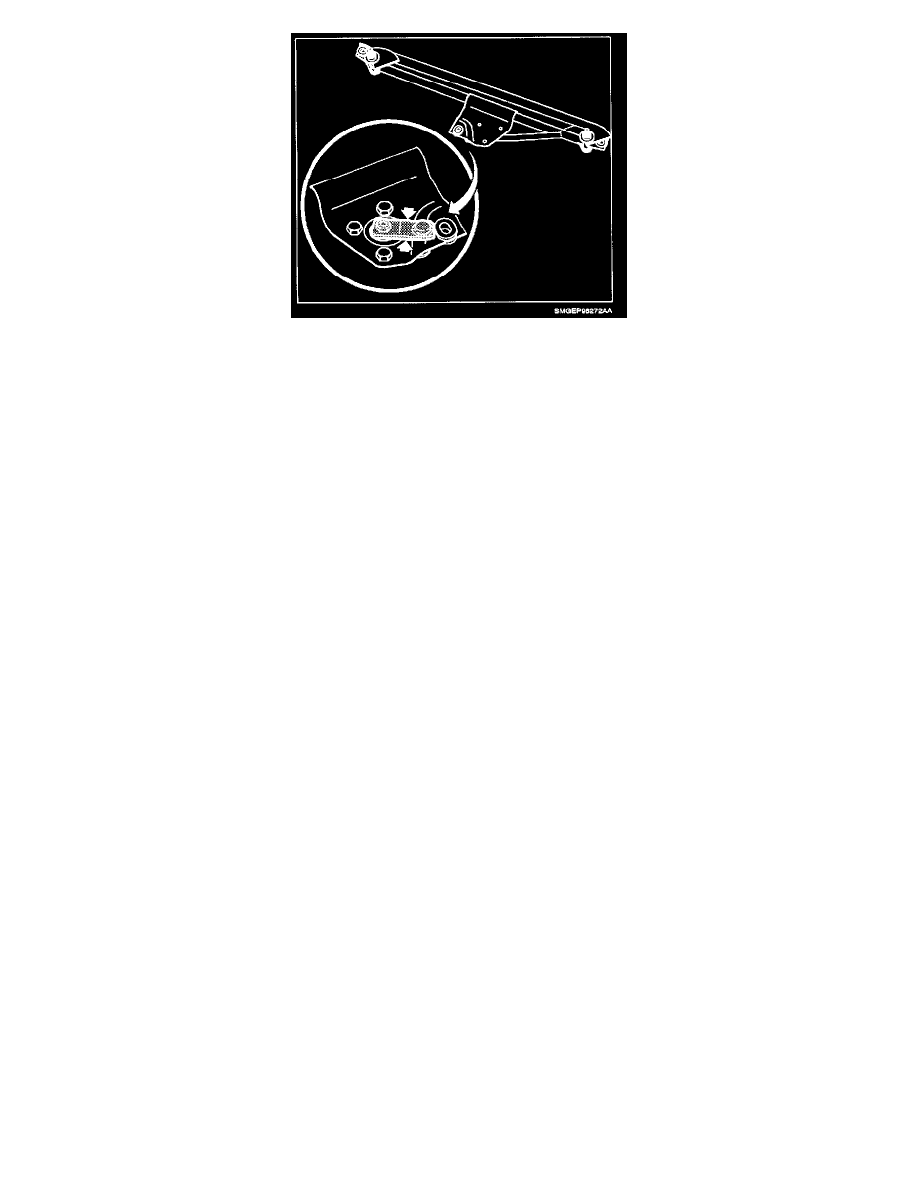
Install the 14 mm wiper motor crank arm (provided with the replacement linkage), aligning it in between the alignment marks on the linkage
mounting plate.
7.
Install crank arm washer and nut.
Torque:
Wiper Motor Crank Arm Nut: 15 - 20 N.m (11 - 15 ft-lbs)
8.
Install linkage connecting arm-to-wiper motor crank arm ball stud.
9.
Refer to the "Wiper/Washer" section of the applicable year Body/Electrical Volume II Service Manual for installation of the linkage and motor to
vehicle.
WIPER MOTOR REPLACEMENT 2003 MODEL YEAR
1.
Remove wiper motor crank arm from wiper motor and save for reinstallation.
2.
Remove three wiper motor fasteners and remove wiper motor from linkage.
3.
Install new wiper motor on linkage and install fasteners.
Torque:
Wiper Motor-to-Frame Fasteners: 5 N.m (44 in-lbs)
IMPORTANT:
Steps 4-6 are required to ensure the wiper motor and crank arm are properly timed to the linkage.
4.
Connect the wiper motor into the vehicle wiper electrical harness.
5.
With the key on, cycle the wiper switch to the "Low Speed" position, and then back to "Park". This will ensure the wiper motor is in the "Park"
position before installing the wiper motor crank arm.