
RELAY AWD V6-3.5L VIN L (2006)
Front Door Hinge: Service and Repair
Hinge Replacement - Front Door
Removal Procedure
Important: Hinges are serviced as an assembly and in pairs. The body side and door side are one unit. In order to minimize door
realignment, DO NOT remove both door hinges at the same time. Repair each hinge separately. Replace any broken hinges first.
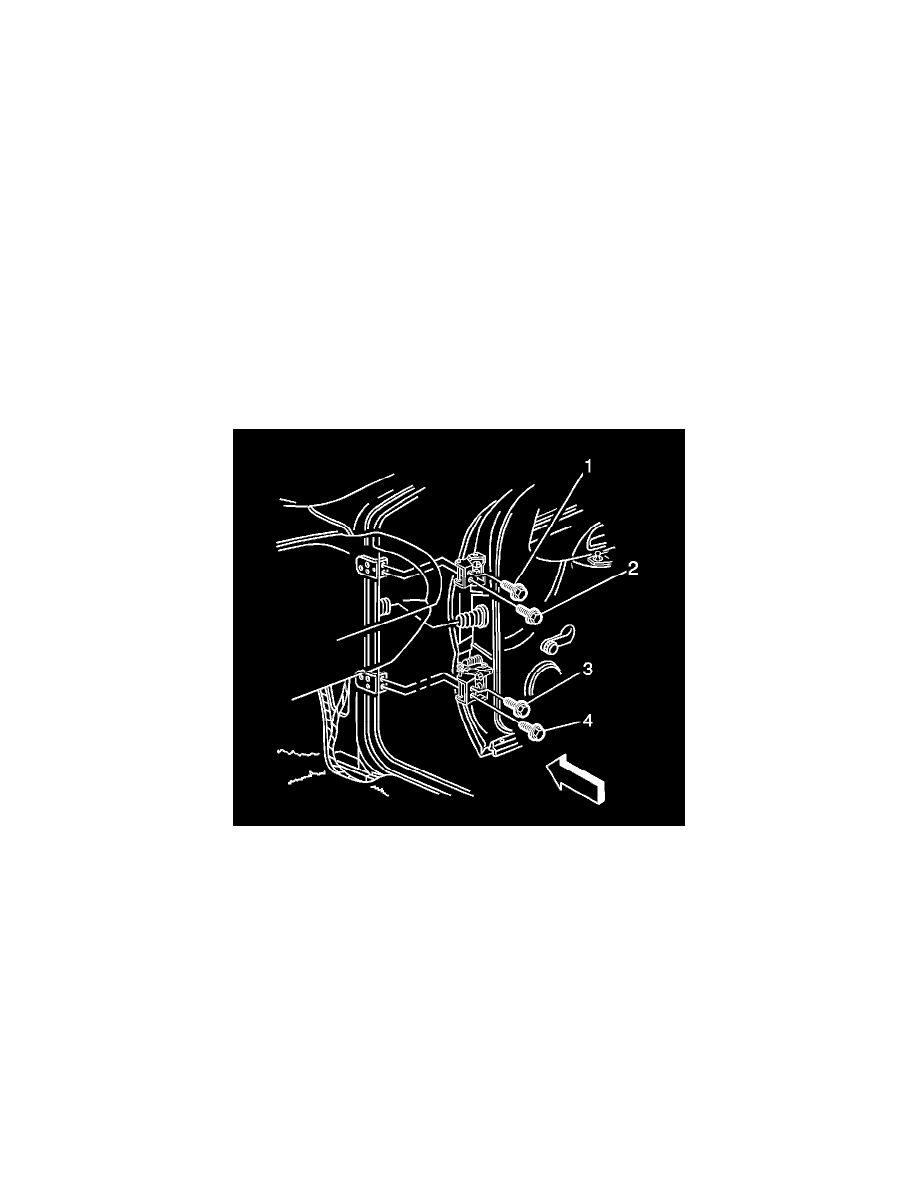
Important: The body side door hinge has three attaching bolts. Two bolts are 13 mm and one bolt is 10 mm. DO NOT remove the 10 mm
bolt. The cone attached to the back side of the hinge may fall to the bottom of the A-Pillar. The cone is used for assembly purposes only.
You DO NOT need to remove the cone in order to adjust or remove the door hinge strap on the body side hinge.
1. Use 2 pieces of masking tape for the following procedure:
1. Place a piece of tape over the gap between the door and the rocker panel.
2. Place the second piece of tape over the gap between the door and the rear door or quarter panel.
2. Use a utility knife or other suitable tool in order to cut the tape at the gap area.
3. Clean the hinge mounting surfaces on the door and the body with a rag.
4. Mark the hinge locations on the body surfaces with a grease pencil or other suitable marker.
5. Support the door.
6. Remove the upper or lower body side hinge bolts from the hinge.
7. Remove the upper or lower door side hinge bolts from the door.
8. Remove the hinge from the door and body.
9. Remove the cone adjuster bolt from the hinge.
Installation Procedure
Notice: Refer to Fastener Notice in Cautions and Notices.
1. Install the cone adjuster bolt to the hinge.
Tighten the bolt to 10 N.m (89 lb in).