
SC2 L4-1.9L DOHC VIN 7 (1996)
13.
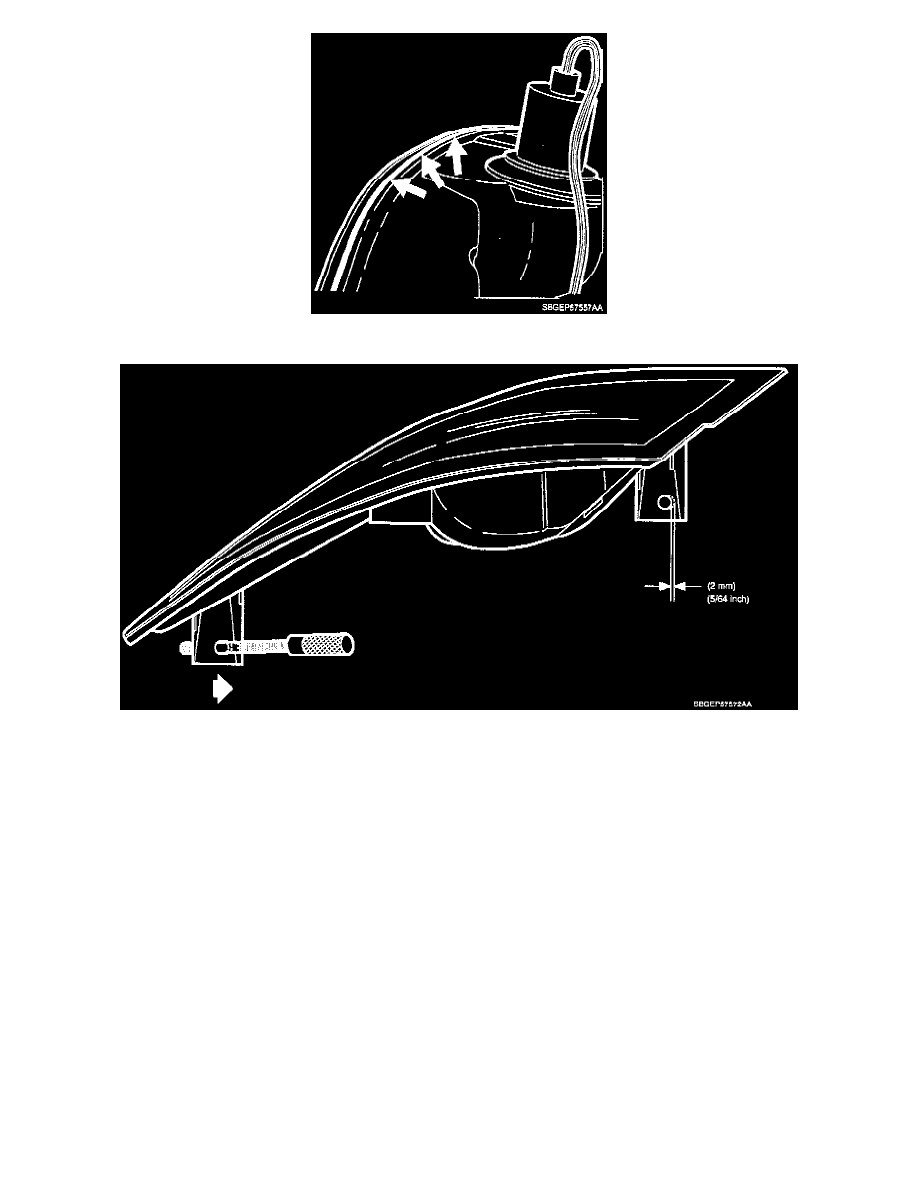
Using an emery board or file, remove excessive adhesive boilout (gray in color) along the bottom rearward half of the lamp assembly.
14.
If necessary, slot the lamp assembly attachment holes forward up to 2 mm (5/64 in.) to create additional rearward adjustment of the lamp
assembly. (Left side lamp assembly shown in illustration, right side lamp assembly similar.)
15.
Install lamp assembly and bolts. Adjust fore/aft adjustment as necessary.
16.
Install partially removed fender and top fender bolts.
Torque: 10 N.m (89 in-lbs)
17.
Install fender to fascia nuts located on backside of fascia.
18.
Position wheelhouse liner to vehicle.
19.
Install plastic fasteners and bolts at outer edge of wheelhouse panel.
20.
Install inner plastic fasteners.