
Sky L4-2.4L (2007)
5. Peel back the top fabric to expose the rear of the 1-2 bow as shown (1).
6. Using a utility knife, score the number 1-2 bow in the areas shown in white (1). Make several passes with the knife to create a deep score line. Do
not go past the rivet on the bracket retainer (1).
7. Using vise grip pliers, lock onto the area shown in white and snap off the section of the number 1-2 bow.
Danger
Avoid using power tools. The magnesium top bow material is flammable.
8. Use a flat file to smooth the edges of the new surface.
Important
The old adhesive must be removed, Follow the manufacturer's directions for the new adhesive.
9. Use 3M(TM) trim glue, or equivalent, to glue the top fabric to the number 1-2 bow assembly.
10. Install the right and left front side weatherstrip retainers, using the paint locating marks for alignment. Refer to Folding Top Side Front
Weatherstrip Retainer Replacement in SI.
11. Install the new service replacement right and left rear weatherstrip retainers. Do not tighten the fasteners. Refer to Folding Top Side Rear
Weatherstrip Retainer Replacement in SI.
12. With the fasteners loose, position the rear weatherstrip retainers as far down as possible on the mountings.
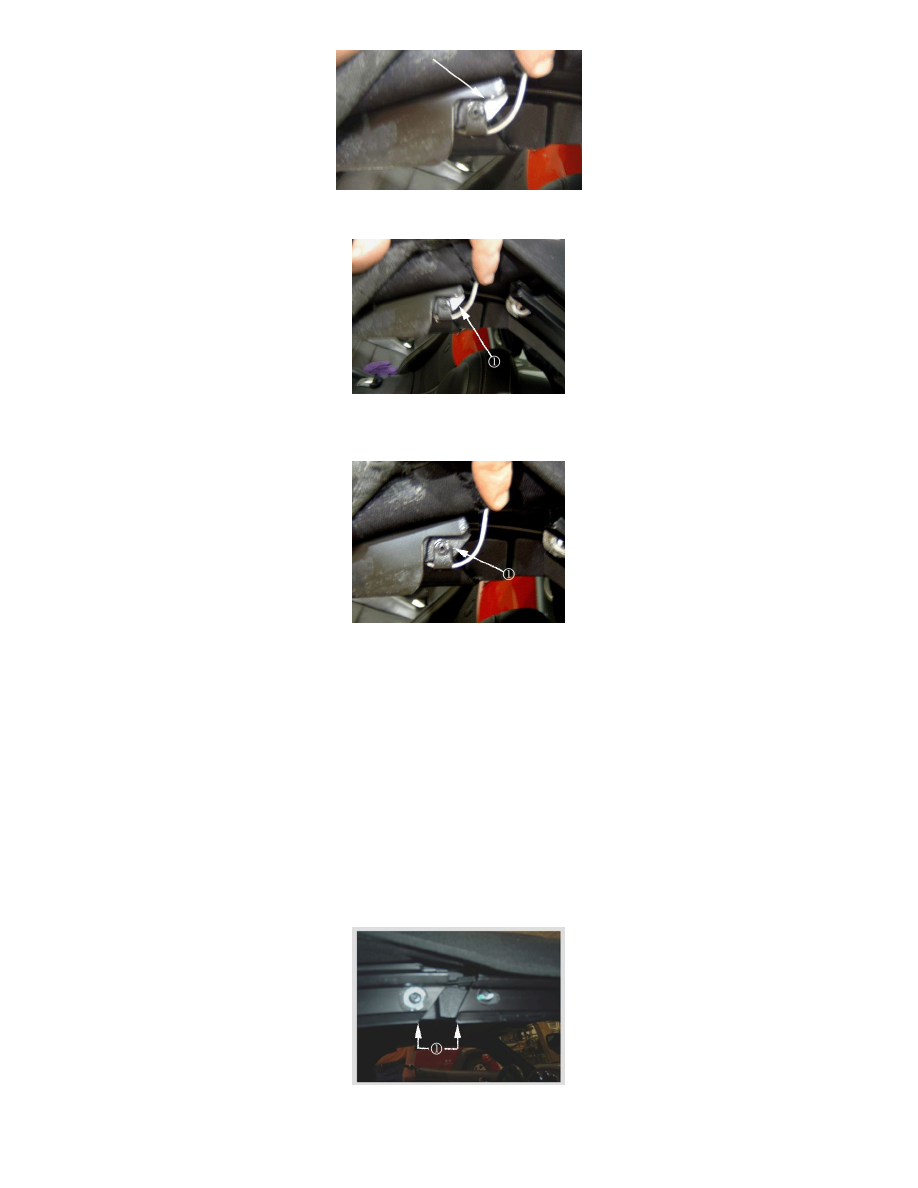
13. Align the front and rear retainers with a gap of 26.5 mm (1.0433 in) plus/minus 0.5 mm (0.0197 in) between the lower edge of the front and rear
retainers. Tighten all fasteners to specification (1).