
Sky L4-2.4L (2007)
5. When the J 43650 is inserted in the block, turn the J 43650 so that the foot becomes perpendicular to the shaft.
6. Center the foot of the J 43650 on the balance shaft bushing.
7. Once the J 43650 is centered on the balance shaft bushing, then insert the centering guide into the front balance shaft bore and tighten the nut with
an appropriate wrench.
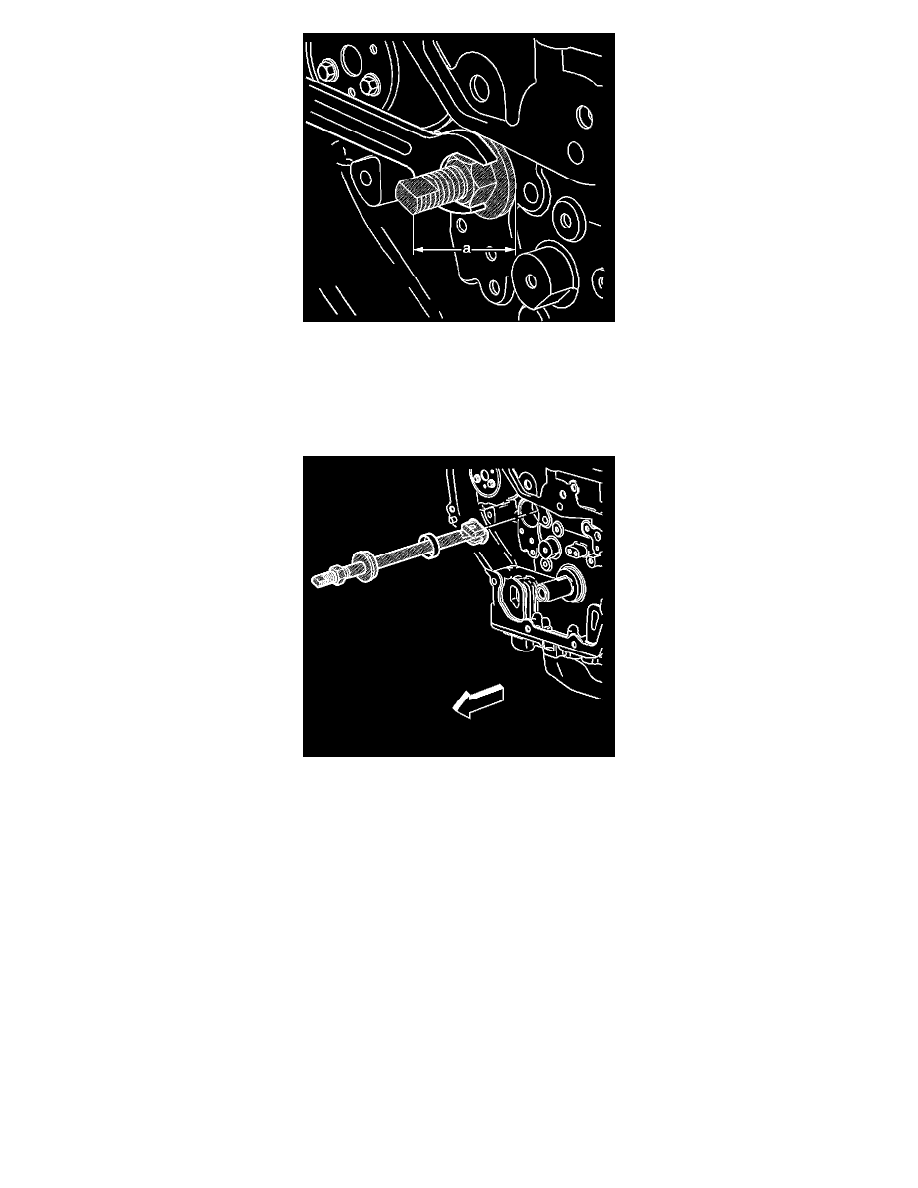
When the J 43650 is properly installed, before removing the bushing, the end of the tool should be 116 mm (4.6 in) (a) from the block face.
If the J 43650 is less than approximately 114 mm (4.5 in) (a), recheck the tool alignment.
8. Tighten the nut on the J 43650 until the tension releases. When the tension releases, remove the J 43650 and the balance shaft bushing. (right side
shown, left side similar).
Installation Procedure
Important: Service the balance shaft as an assembly. DO NOT disassemble or assemble the balance shaft.