
SL L4-1.9L SOHC VIN 8 (1997)
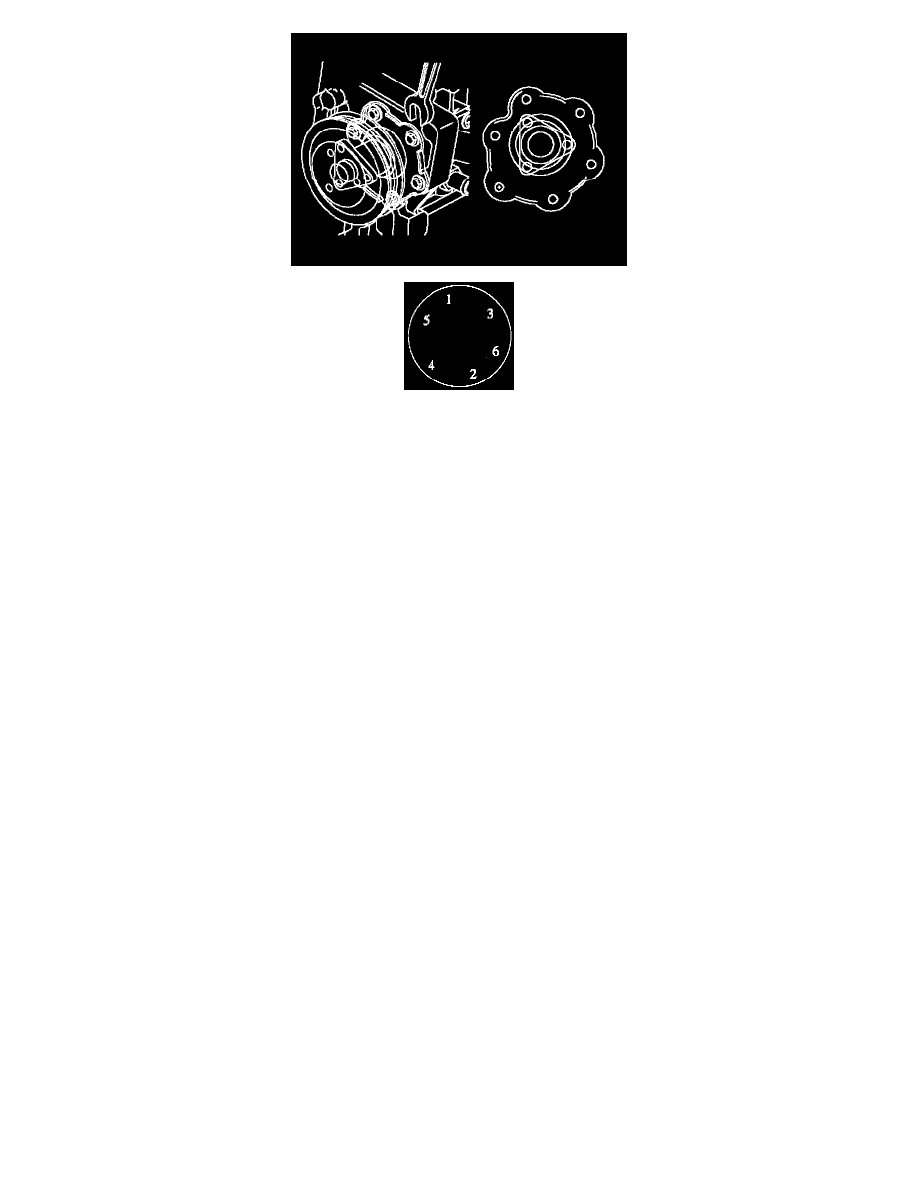
NOTE: A small mark (bump) is located next to one attachment bolt. The mark is positioned at the 11 o'clock position during installation of the
water pump. Torque the bolts in the sequence shown. Torque to 30 Nm (22 ft. lbs.).
4. Install pulley on pump hub. The pulley can be held using a strap wrench, block of wood or hammer handle. Torque to 25 Nm (19 ft. lbs.).
NOTE: If the pump pulley hub end extending through the pulley is rusty, clean it with a wire brush and apply a thin coat of primer paint to
prevent the pulley from rusting on the hub.
5. Install accessory drive belt. See Engine.
6. Install right hand side wheel house splash shield and tire.
7. Close radiator drain plug and install cylinder block drain plug. Torque cylinder block drain plug to 35 Nm (26 ft. lbs.).
NOTE: The vehicle must be level when filling with coolant.
8. Remove pressure cap and fill the system with coolant. Use only a non-phosphate ethylene glycol-base coolant, mixed according to the
manufacturer's specification.
9. Start engine.
10. Fill the cooling system surge tank to the FULL COLD line after engine has run two to three minutes. Install pressure cap and check for leaks.