
SL L4-1.9L SOHC VIN 8 (1997)
d. The strut mounting bracket consists of two layers of metal, an inner layer and an outer layer. The inner layer has a round 14.4-14.8 mm (0.57 -
0.58 in.) hole through it at the mounting locations, while the outer layer has a 18.4 - 18.8 mm (0.72 - 0.74 in.) slot through it.
Using a round file or grinder, remove material from the inner layer of the strut bracket lower hole. The round hole may be increased to the size
and shape of the slot in the outer layer. Do this on both sides of the strut bracket.
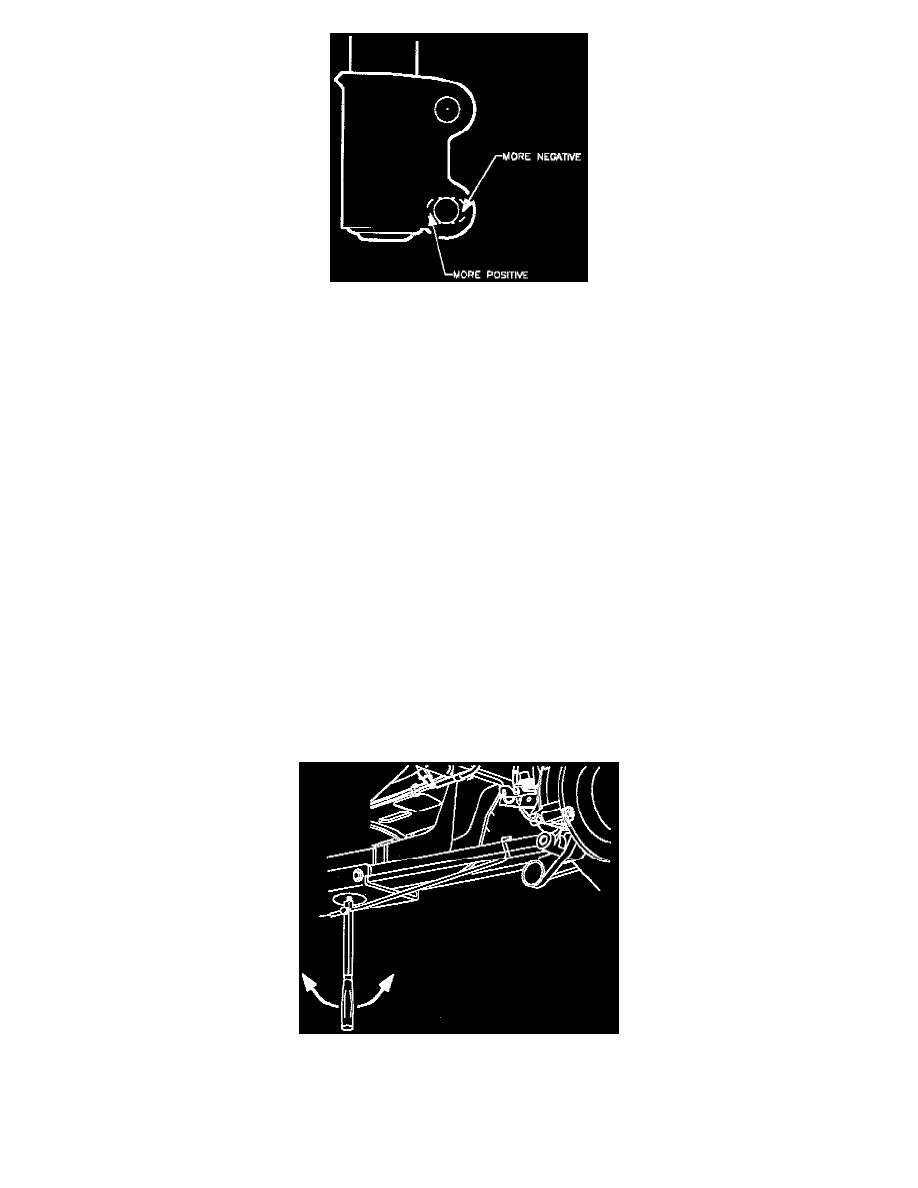
To increase negative camber, remove material from the outside of the lower strut hole.
To increase positive camber, remove material from the inside of the lower strut hole.
IMPORTANT: If strut was filed or ground, paint exposed metal with primer.
e. Position knuckle back into strut with fasteners.
3. Tighten strut-to-knuckle fasteners.
-
Torque: 170 Nm (126 ft. lbs.)
NOTICE: Before installing wheels, remove rust or corrosion from wheel mounting surfaces and brake rotors/drums. Failure to do so can cause
wheel lug nuts to loosen in service.
4. Position wheel onto hub.
5. Install wheel nuts and tighten in a crisscross pattern. Repeat tightening pattern to make sure torque is correct.
-
Torque: 140 Nm (103 ft. lbs.)
6. Lower vehicle from hoist.
7. Check camber angle and adjust if necessary.
Rear Toe Adjustment
1. Loosen the rearmost inboard lateral link to crossmember fastener on one of the rear wheels.
2. With SA9158S (or equivalent), move lateral link in the direction of necessary toe correction (right side shown, left side opposite).
3. Tighten the lateral link-to-crossmember fastener.
-
Torque: 120 Nm (89 ft. lbs.)
4. Check toe and adjust if necessary.