
SL L4-1.9L SOHC VIN 8 (1997)
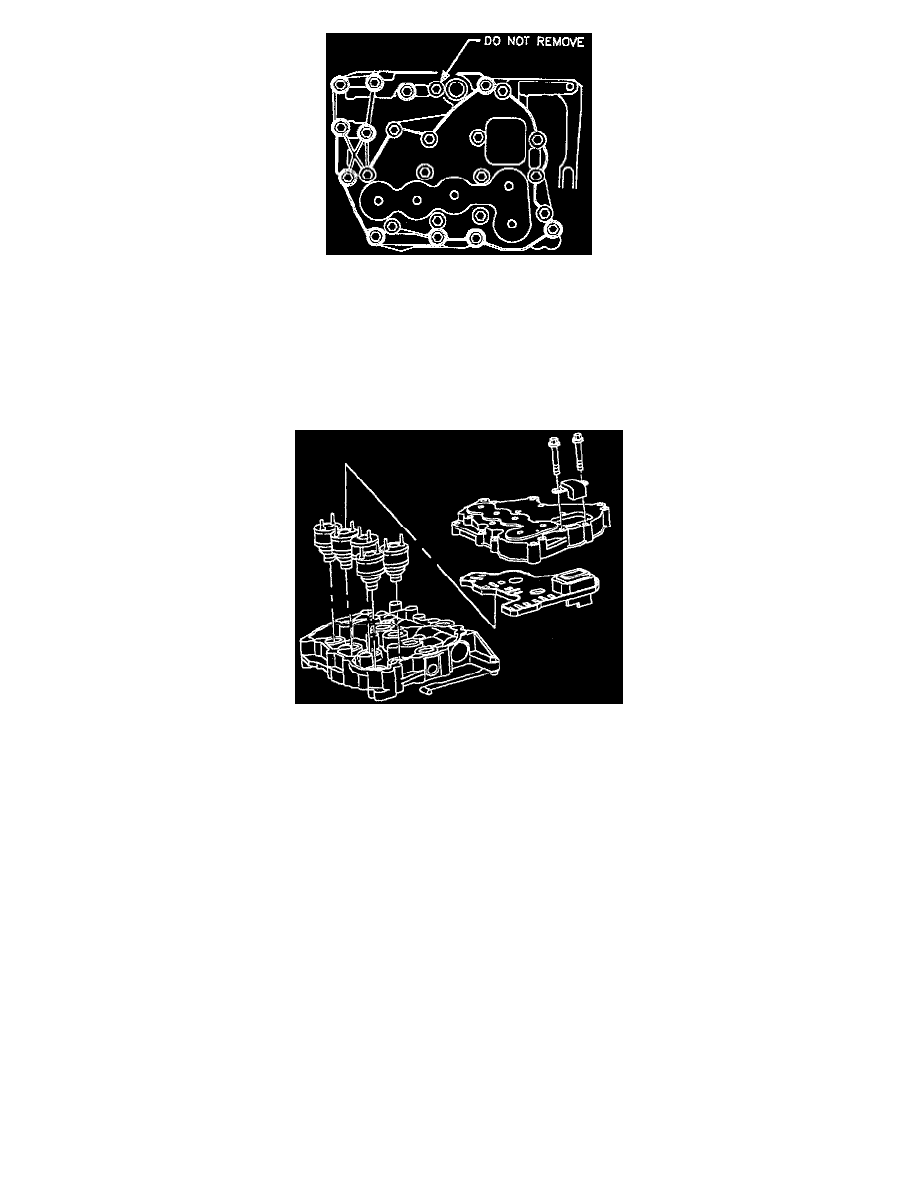
10. Remove 11 valve body-to-case bolts (identified on illustration by the heavy circles).
IMPORTANT: Do not remove the bolt indicated in the drawing. This bolt holds the upper and lower valve body together as the valve body is
removed. If bolt is removed in the vehicle, parts will fall into the transaxle.
11. Pull valve body up and disengage from manual valve link.
12. Remove valve body.
Disassembly
IMPORTANT: The valve body should only be disassembled if directed by the diagnostic charts or if the transaxle is being overhauled. Care must be
taken when removing valve body valves as these valves are not serviced separately. Whenever the valve body is disassembled, new spacer plate
gaskets must be installed.
1. Remove actuator cover-to-valve body bolts and remove actuator cover.
2. Lift actuator connector plate off actuator pins using care not to damage connector plate.
3. Remove actuator by using a twisting motion.
4. Remove bolt retaining the two halves of the valve body.
IMPORTANT: Note check ball positions when taking two halves apart.
5. Remove valves from the upper and lower valve body halves.
IMPORTANT: Remove detent arm on upper valve body before removing line pressure regulator valve.
Assembly