
SL L4-1.9L SOHC VIN 9 (1991)
Hydraulic Assembly: Service and Repair
Anti-Lock Brake Control & Master Cylinder Assembly
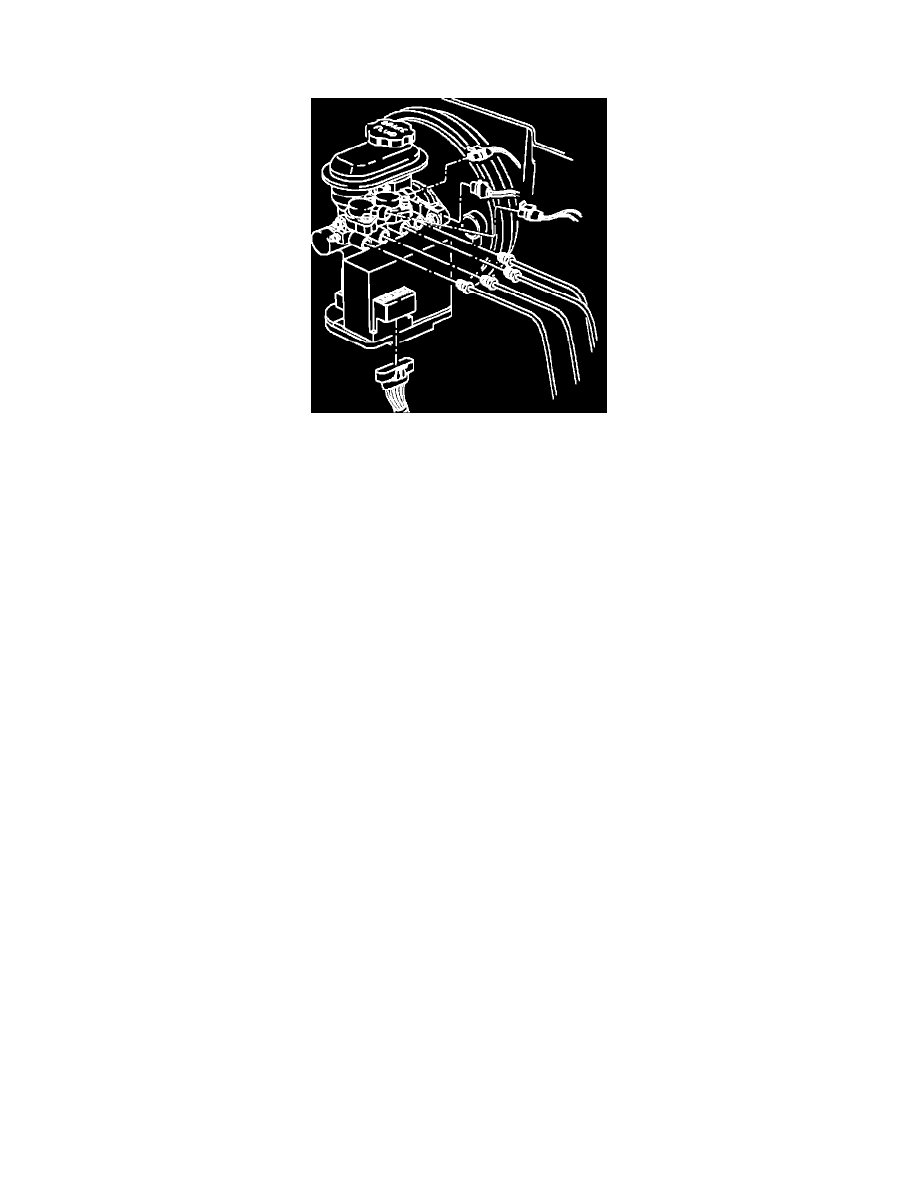
Fig. 63 Removing Anti-lock Brake Control & Master Cylinder Assembly
The control assembly drive gears are under spring tension and will turn during disassembly if not unloaded. To remove tension, use the
SATURN scan tool or equivalent to perform the ``RUN ABS MOTOR, PISTONS DOWN-REL,'' before removing the brake control assembly.
Do not drive vehicle with anti-lock brake control assembly in the tension released position. Excessive brake pedal travel and reduced brake
effectiveness could occur. Always perform ``RUN ABS MOTORS, PISTONS UP-HOME,'' before driving vehicle.
1.
Disconnect battery cables, then remove battery from vehicle.
2.
Disconnect two electrical connectors from solenoid valves, then the brake fluid level sensor connector at the master cylinder.
3.
Remove CPA locking pin from 6-way motor pack connector,
Fig. 63.
4.
Placing a shop cloth on top of the motor pack assembly, remove brake line fitting nuts from modulator.
Plug open lines to prevent brake fluid
loss and contamination.
5.
Remove two brake control assembly to brake booster attaching nuts.
6.
Remove brake control and master cylinder assembly from vehicle.
7.
Reverse procedure to install,
torque assembly to brake booster attaching nuts to 20 ft. lbs. and brake line fitting nuts to 18 ft. lbs.