
SL L4-1.9L SOHC VIN 9 (1991)
Current
Replacement
Instrument
Instrument
Cluster Asm
Cluster Asm
21021073
21021209
21021074
21021210
21021075
21021211
n.
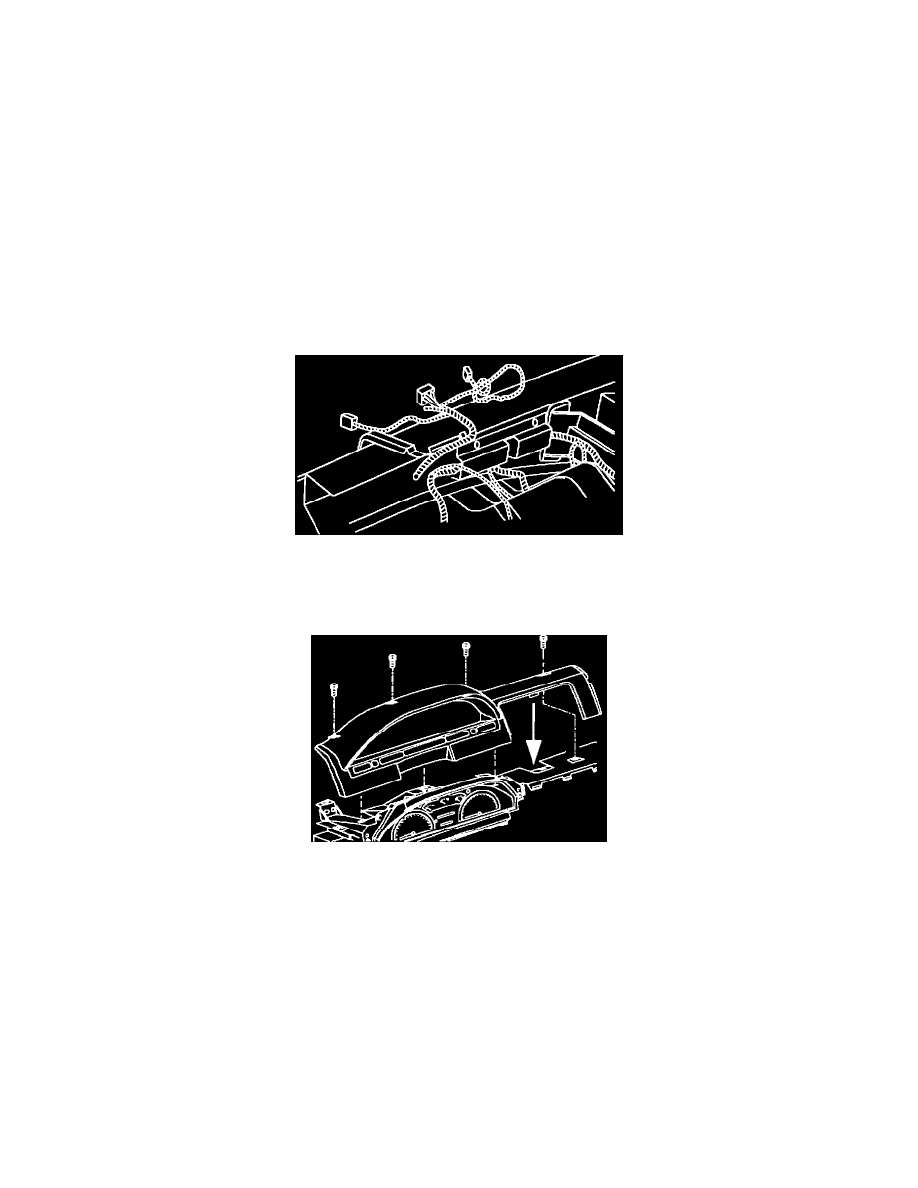
Disconnect electrical connectors, by depressing the retainer tabs, and remove the instrument cluster assembly.
o.
Connect electrical connectors on instrument cluster assembly.
IMPORTANT:
Make sure electrical connectors for instrument panel lighting and rear window defogger switches are in place.
p.
Install instrument cluster assembly and screws.
IMPORTANT:
When replacing instrument cluster assembly, use new wax dip screws P/N 21040914.
q.
Position cluster trim panel to instrument panel.
r.
Connect electrical connectors on instrument panel lighting and rear window defogger switches and install CPA devices to
electrical connectors.
s.
Install cluster trim panel into retainers.
t.
Install and tighten screws.