
SL L4-1.9L SOHC VIN 9 (1991)
14. Install trim panel to door frame with screw and tighten.
15. Install removed portion of window frame garnish by pushing to seat in channel.
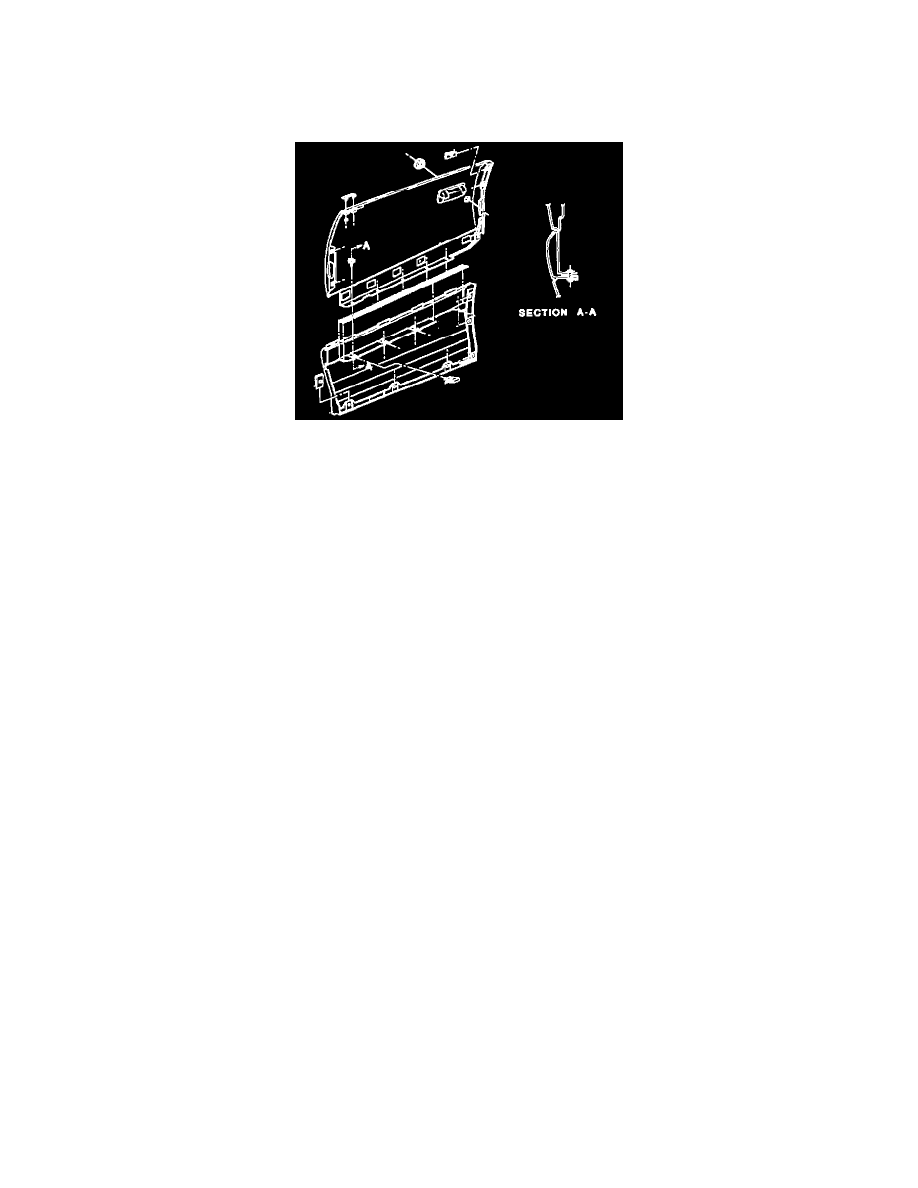
Two Piece Outer Panel
REMOVAL
1. Remove outer door panel.
2. Remove door outer panel upper to lower screws. Rotate lower outer panel upward to disen& gage tabs and separate lower from upper.
3. If damaged, remove foam sealing strip from door outer upper horizontal attaching flange.
4. If replacing upper:
a. Remove door lock cylinder bezel compressing retainer tabs and pushing out.
b. Remove J-clips.
c. Remove trim molding and clip.
5. If replacing lower:
a. Remove rivets by pushing mandrel out with punch and remove outer door panel lower sealing strip.
b. Remove J-clips.
INSTALLATION
1. If replacing upper:
a. Install clip and trim molding.
b. Install door lock cylinder bezel.
c. Install J-clips
2. If replacing lower:
a. Install outer door panel lower sealing strip with rivets.
b. Install J-clips.
3. If foam seal strip is removed, replace by applying a strip of Kent Industries P/N 40105 1/4 in. x 5/32 in. or equivalent along the outboard edge of
the upper to lower attaching flange of the upper outer door panel (be careful not to cover holes).
4. Align lower panel tabs with corresp6nding upper panel slots. With tabs engaged in slots, rotate upper downward into position.
5. Install upper to lower screws, align fore/aft relationship of upper to lower and tighten.
Torque: 6 Nm (53 in.lbs.)
6. Install outer door panel.
Front Door Trim Panel
REMOVAL