
SW L4-1.9L DOHC VIN 7 (1993)
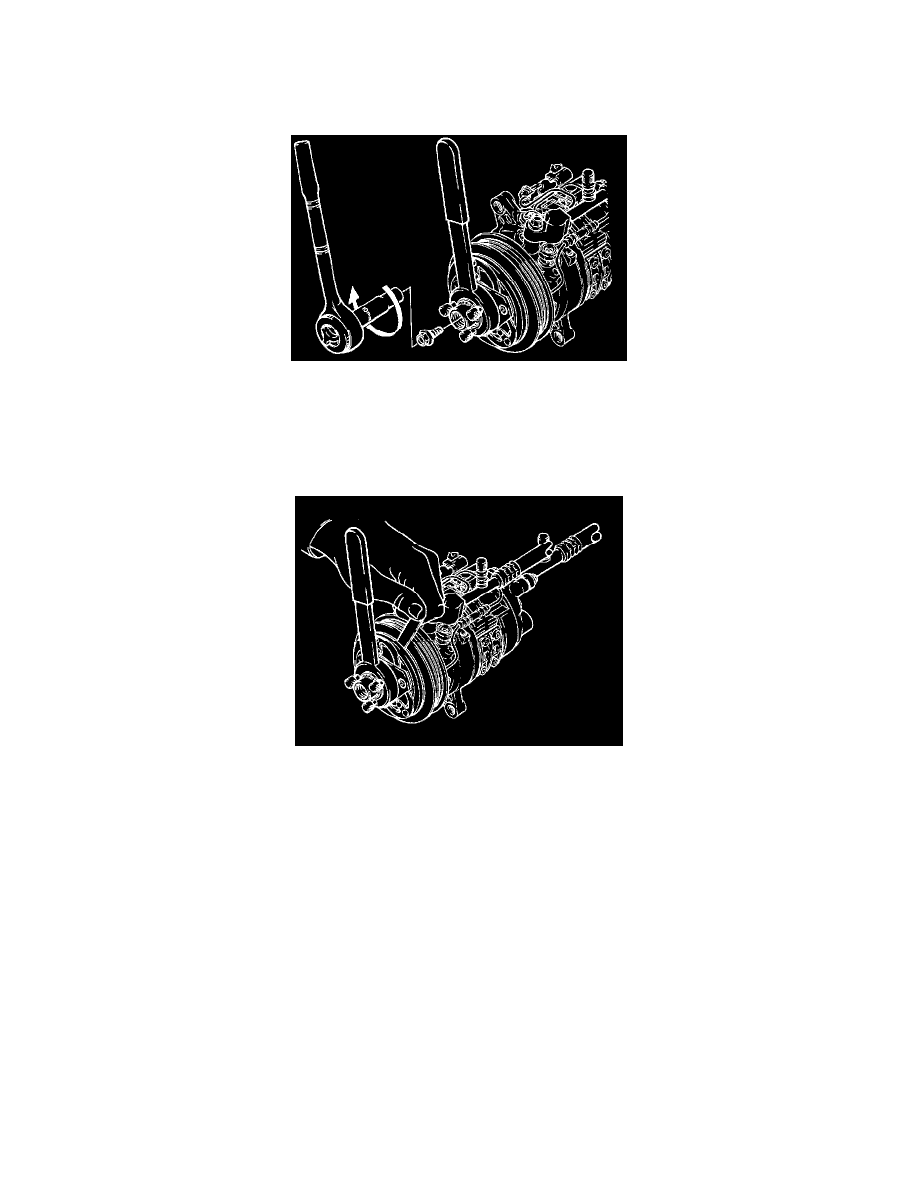
11. Slide the drive plate onto the splines of the compressor shaft.
IMPORTANT: Make sure splines are engaged by rotating drive plate back and forth before tightening nut.
12. While holding the end of the installation bolt, tighten nut to press drive plate onto compressor shaft. Tighten until drive plate bottoms.
13. Loosen installation bolt nut. Remove installation bolt.
14. Install center bolt. Torque bolt to specification.
Torque: 11.8-14.7 N.m (104-130 in-lbs)
NOTICE: After tightening the bolt, check to be sure that the pulley rotates smoothly by spinning it.
15. Check that the clutch clearance is between 0.3 and 0.6 mm (0.01 and 0.02 in). If necessary, adjust the clearance by using shim(s) provided.
Repeat steps 5 and 6 of compressor clutch removal. Then repeat steps 7 through 13 of Compressor Clutch Installation.
16. Connect electrical harness to coolant bottle.
17. Install washer and coolant bottles. Tighten the bolts to the washer/coolant bottles and install heater return pipe in hold down clips.
18. Install accessory drive belt.
19. Start engine and engage A/C compressor 10-15 cycles to brake-in new clutch assembly. This will match drive plate and pulley surfaces.