
SW L4-1.9L DOHC VIN 7 (1993)
8.
Cover interior of vehicle to protect it from spray.
9.
Disconnect blower motor connector.
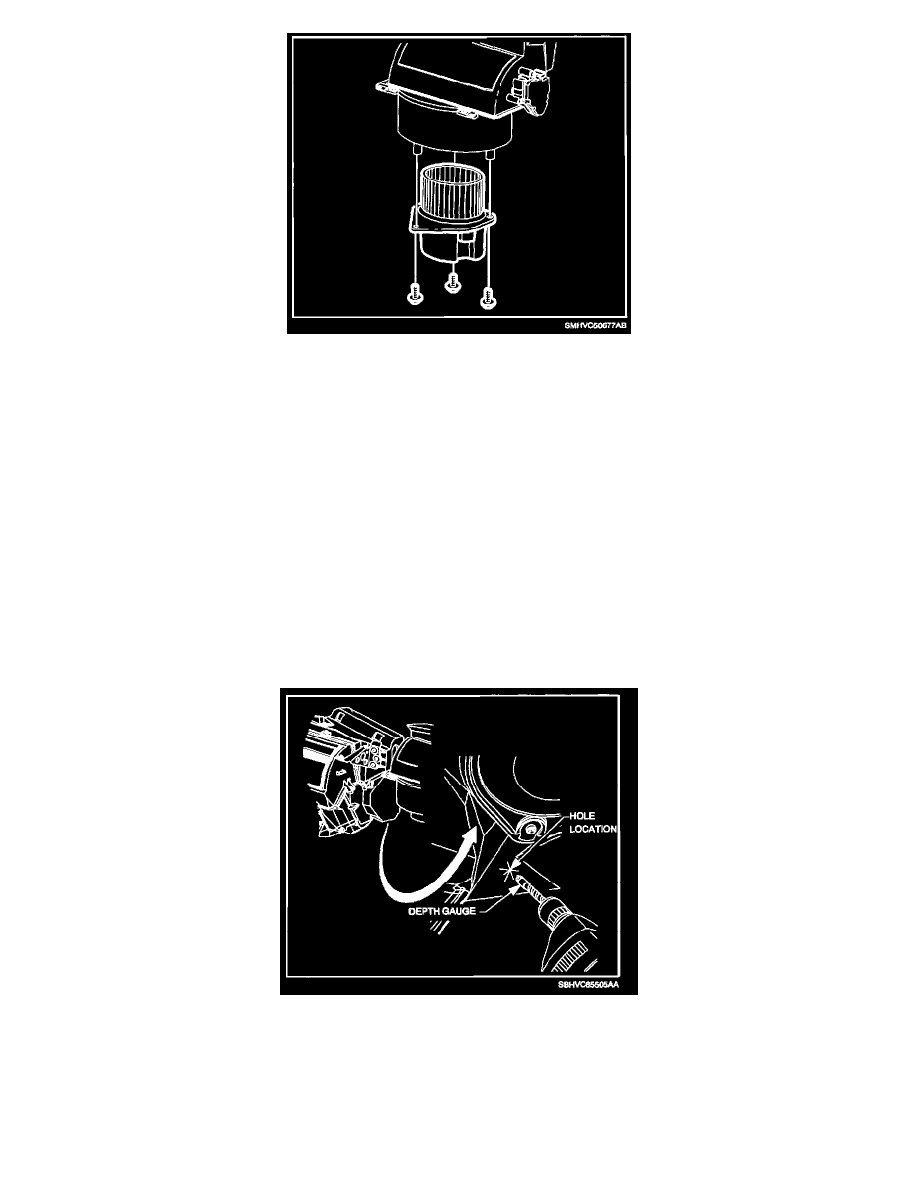
10.
Remove blower motor mounting screws and remove blower motor assembly.
IMPORTANT:
Use care when removing debris from front of evaporator so no damage is done to the fins.
11.
Check the HVAC module for debris through the blower motor opening. Remove any debris from evaporator face. (Refer to Bulletin 92-T-41,
"Water or Debris Intrusion into Blower Motor," to restrict water and foreign material from entering HVAC module.)
12.
Install blower motor and connect electrical connector.
Torque:
Blower Motor Mounting
Screws: 1.7 N.m (15 in-lbs)
13.
Using a 15/32 in. drill bit, attach a drill stop or depth gauge, or masking tape to allow for a 4 mm (5/32 in.) depth.
14.
Locate the center of the triangle shaped portion of the plenum which slopes upward and to the right, next to the left-most blower motor fastener.
NOTICE:
Running the drill bit in more than 4 mm (5/32 in.) can damage the evaporator.
15.
Drill a 15/32 in. hole. Be careful not to let the drill bit penetrate beyond a 4 mm (5/32 in.) depth.