
SW2 L4-1.9L DOHC VIN 7 (1997)
Intake Manifold: Service and Repair
Installation
CAUTION: Make sure cylinder head and intake manifold gasket sealing surfaces are clean.
1. Install new intake manifold gasket.
2. Install intake manifold onto attaching studs.
3. Install intake manifold attaching nuts.
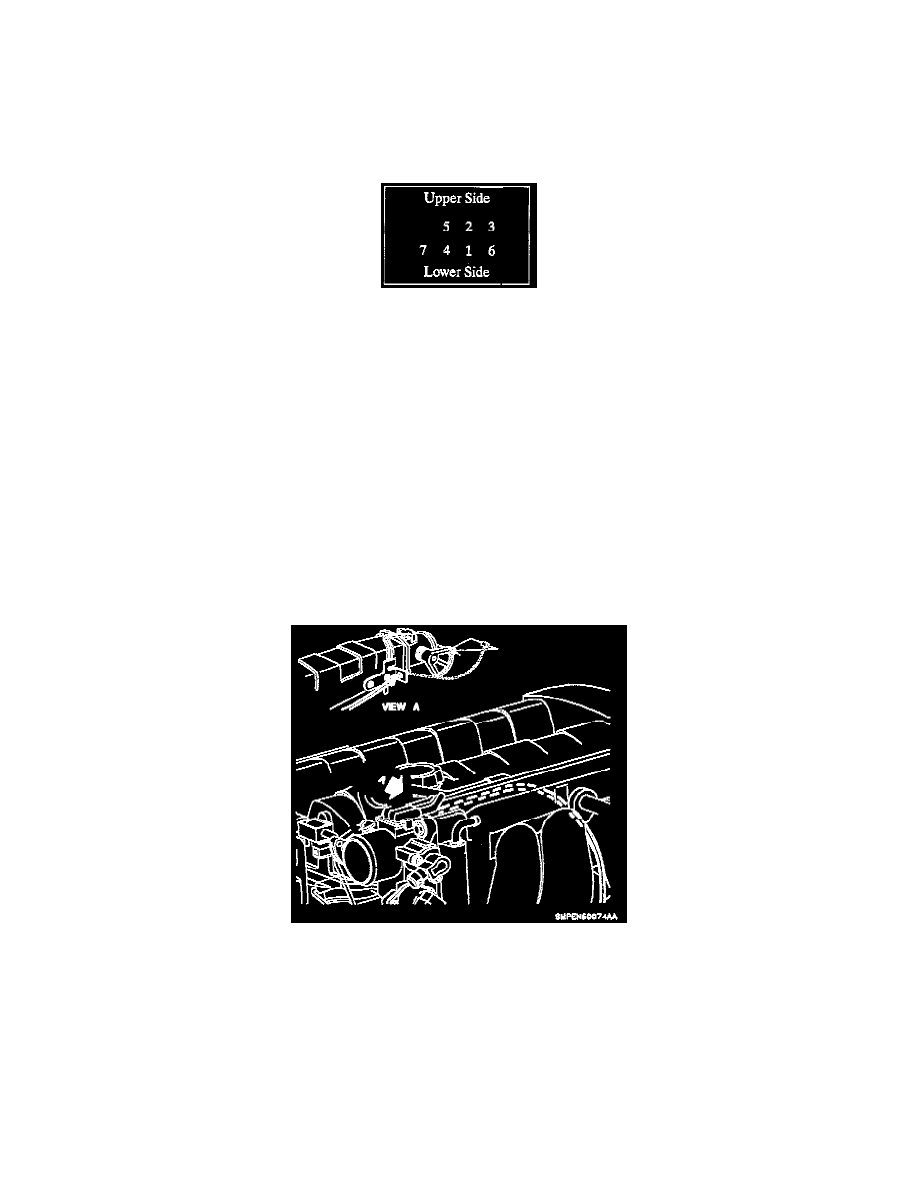
Intake Manifold Bolt Tightening Sequence
4. In sequence, torque the intake manifold attaching nuts. Torque to 30 Nm (22 ft. lbs.).
5. Install power steering pump assembly and brackets. Torque to 38 Nm (28 ft. lbs.).
6. Install accessory drive belt. Make sure belt is properly aligned on the pulleys.
7. Connect heater and deaeration hoses to intake manifold outlets.
8. Install intake manifold support brackets.
^
Torque: R/H to Block 55 Nm (41 ft. lbs.).
^
Torque: L/H to Block 30 Nm (22 ft. lbs.).
^
Torque: Support Brackets-to-Intake Manifold 30 Nm (22 ft. lbs.).
CAUTION: Whenever fuel line connects are disconnected, lubricate steel line male ends with clean engine oil. Holding steel line, firmly press on
female connector until click is heard, then pull back to confirm engagement. Make sure the fuel line connects are fully seated. Pinched, kinked or
damaged fuel lines must be replaced.
9. Connect fuel supply and return line to fuel rail. Install fuel line clip bolt. Torque to 7 Nm (62 inch lbs.).
NOTE: When the throttle cable is removed, make sure the locking tangs are fully engaged when assembled if disconnected.
10. Connect throttle cable to throttle body, and throttle cable support bracket. Attach the accelerator control cable bracket. Torque to 25 Nm (19 ft.
lbs.).
NOTE: Make sure to confirm positive engagement of electrical connectors and vacuum hoses.