SW2 L4-1.9L DOHC VIN 7 (1997)

REMOVAL
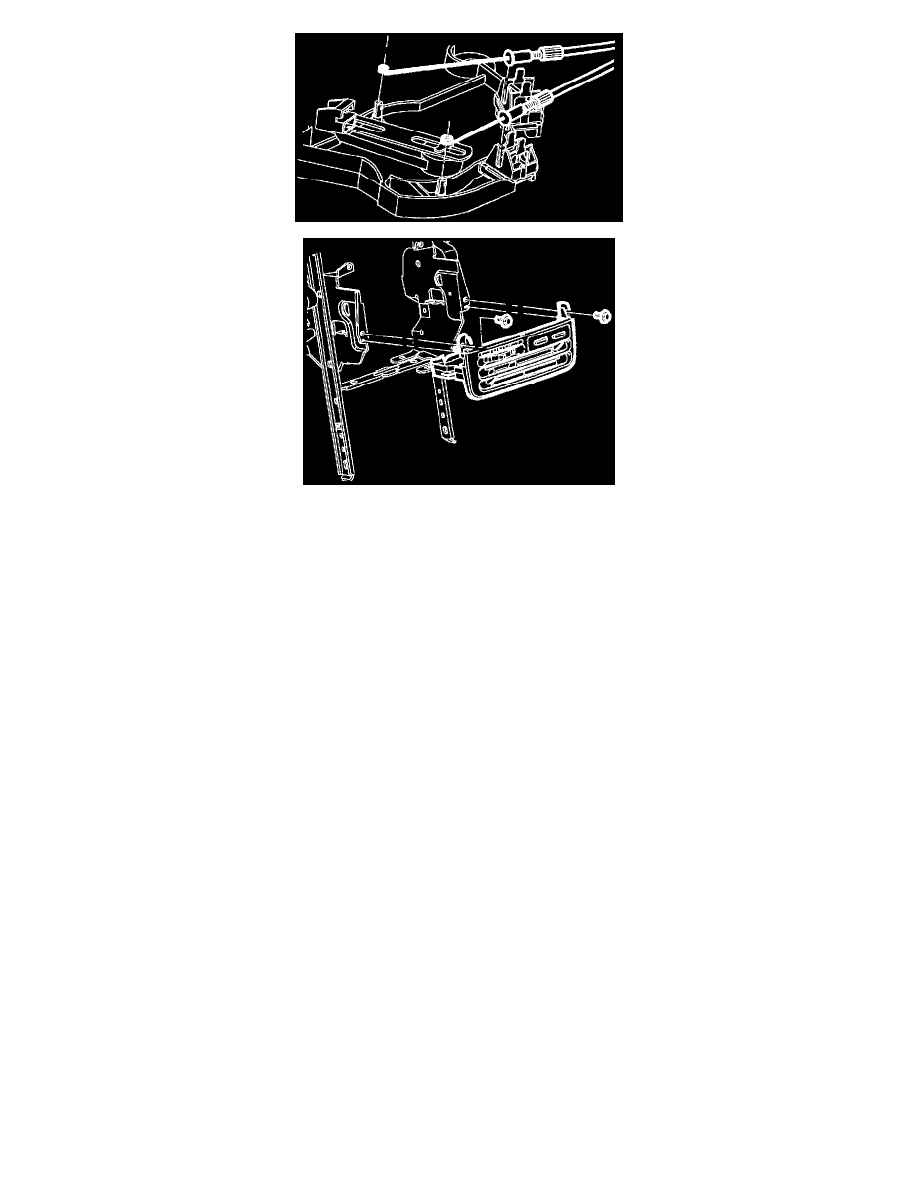
1. Depress center pins inward to release radio/HVAC controller cover push pin fasteners.
IMPORTANT: Do not push center pins through fasteners.
2. Remove fasteners and pull radio/HVAC controller cover rearward.
3. Disconnect traction control/fog lamps/rear defog electrical connector if equipped.
4. Remove radio screws.
5. Push spring clips in through D holes on both sides of radio brace.
6. Pull radio out slightly to access rear of radio.
7. Disconnect electrical connector and antenna.
8. Remove radio.
9. Disconnect blower switch, A/C-Recirc and lighting electrical connectors. Remove electrical harness clip from module boss.
10. Remove temperature and mode cables from HVAC controller by squeezing lock tabs together while pulling cable housing straight up.
11. Remove cables from pins by pulling straight up. (Service cables shown in illustration.)
12. Remove screws and HVAC controller.
INSTALLATION
1. Install HVAC controller.
2. Install and tighten screws.
Torque: 2.5 N.m (22 in-lbs)
3. Install temperature and mode cables over pins. Cable Identification:
^
Temperature cable white
^
Mode cable black
4. Install cable housings into channel and push down to lock.
5. Connect blower switch, A/C-Recirc and lighting electrical connectors.
IMPORTANT: Make sure wiring harnesses do not interfere with control lever movement.
6. Install electrical harness clip to module boss.
7. Connect electrical connector and antenna to radio.
8. Install radio.
IMPORTANT: Make sure spring clips are seated in D-holes on both sides.
9. Install and tighten screws.
