
SW2 L4-1.9L DOHC VIN 7 (1997)
2. Loosen two strut-to-knuckle fasteners and pull or push knuckle in direction of desired change. This will allow up to 1.5 degrees of adjustment.
NOTICE: If more than 1.5 degrees of camber adjustment is required, check for bent suspension components or body structure.
3. If more than 1.5 degrees of camber adjustment is required and no bent components are observed.
CAUTION: MAKE SURE VEHICLE IS PROPERLY SUPPORTED AND SQUARELY POSITIONED ON HOIST. TO HELP AVOID
PERSONAL INJURY, PROVIDE ADDITIONAL SUPPORT TO THE OPPOSITE END OF THE VEHICLE THAT COMPONENTS
WILL BE REMOVED FROM.
a. Raise vehicle on hoist.
b. Remove road wheel.
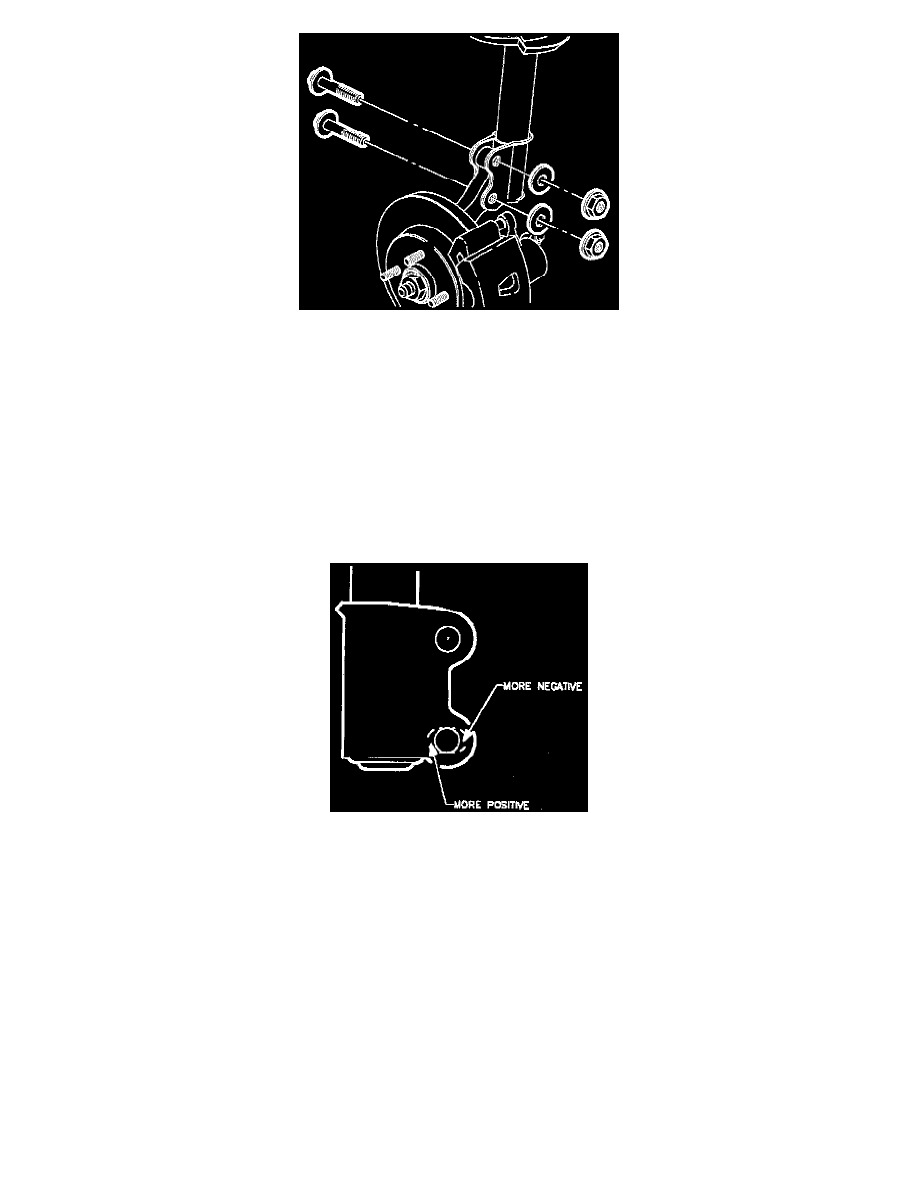
c. Remove two strut-to-knuckle fasteners and separate knuckle from strut bracket.
d. The strut mounting bracket consists of two layers of metal, an inner layer and an outer layer. The inner layer has a round 14.4-14.8 mm
(0.57-0.58 in.) hole through it at the mounting locations, while the outer layer has a 18.4 - 18.8 mm (0.72 - 0.74 in.) slot through it.
Using a round file or grinder, remove material from the inner layer of the strut bracket lower hole. The round hole may be increased to the size
and shape of the slot in the outer layer. Do this on both sides of the strut bracket.
To increase negative camber, remove material from the outside of the lower strut hole.
To increase positive camber, remove material from the inside of the lower strut hole.
IMPORTANT: If strut was filed or ground, paint exposed metal with primer.
e. Position knuckle back into strut with fasteners.
4. Tighten strut-to-knuckle fasteners.
-
Torque: 170 Nm (126 ft. lbs.)
NOTICE: Before installing wheels, remove rust or corrosion from wheel mounting surfaces and brake rotors/drums. Failure to do so can cause
wheel lug nuts to loosen in service.