
SW2 L4-1.9L DOHC VIN 7 (1997)
NOTICE: Use new nuts; torque retention of old nuts may not be sufficient.
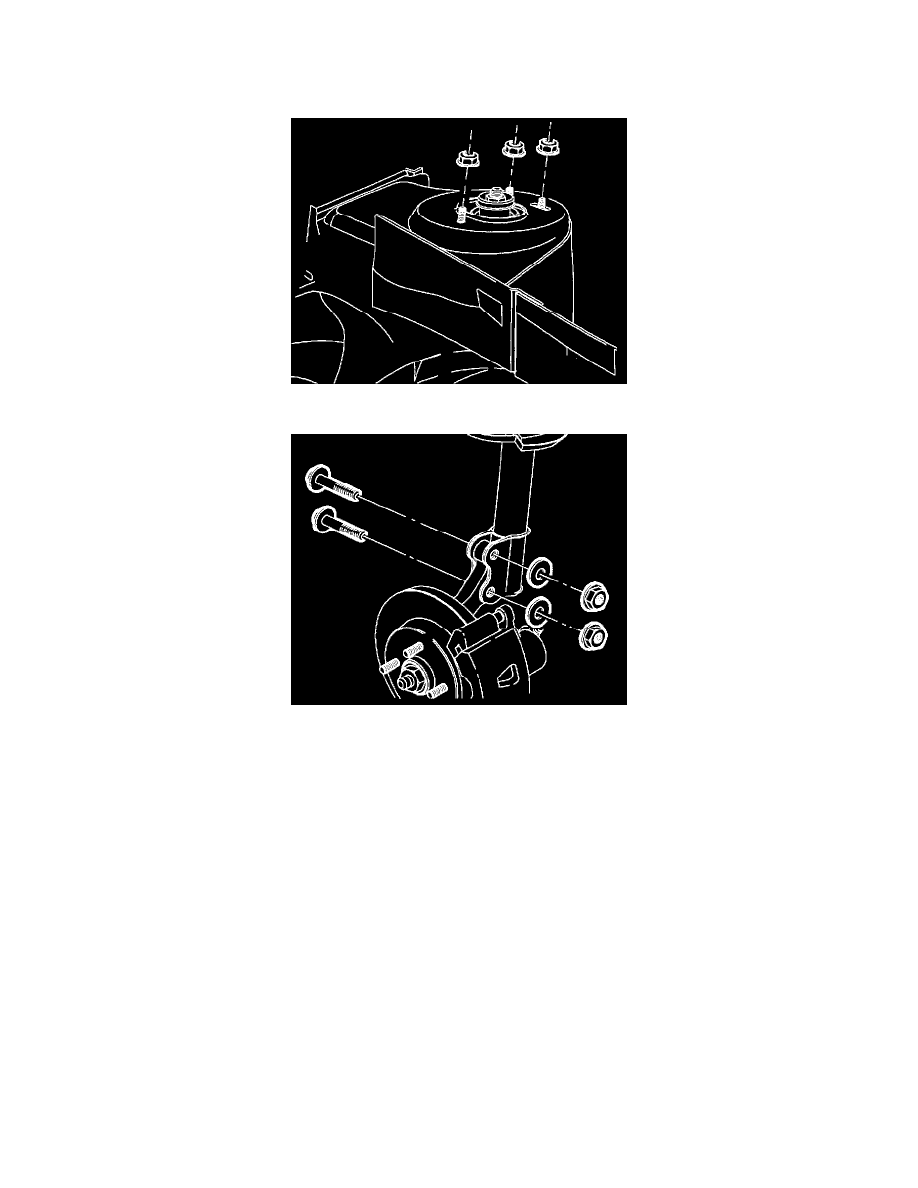
1. Attach strut to the vehicle body with the three strut mount-to-body attachment fasteners.
-
Torque: 29 Nm (21 ft. lbs.)
NOTICE: Use new nuts; torque retention of old nuts may not be sufficient.
2. Attach strut-to-steering knuckle with fasteners.
IMPORTANT: With fasteners installed, but not tightened, push bottom of strut inward while tightening fasteners.
-
Torque: 170 Nm (126 ft. lbs.)
NOTICE: Before installing wheels, remove rust or corrosion from wheel mounting surfaces and brake rotors/drums. Failure to do so can cause
wheel lug nuts to loosen in service.
3. Position wheel onto hub.
4. Install wheel nuts and tighten in a crisscross pattern. Repeat tightening pattern to make sure torque is correct.
-
Torque: 140 Nm (103 ft. lbs.)
5. Lower vehicle from hoist.
6. Perform vehicle wheel alignment.
Removal
1. Remove rear window trim finish panel. (Refer to Body and Frame.)
CAUTION: MAKE SURE VEHICLE IS PROPERLY SUPPORTED AND SQUARELY POSITIONED ON HOIST. TO HELP AVOID
PERSONAL INJURY, PROVIDE ADDITIONAL SUPPORT TO THE OPPOSITE END OF THE VEHICLE THAT COMPONENTS
WILL BE REMOVED FROM.
2. Raise vehicle on hoist.
3. Remove wheels corresponding to the strut being replaced.