
SW2 L4-1.9L DOHC VIN 7 (1997)
-
Torque: 3 N.m (27 inch lbs).
NOTICE: Do not over-tighten or damage to the connector plate may occur.
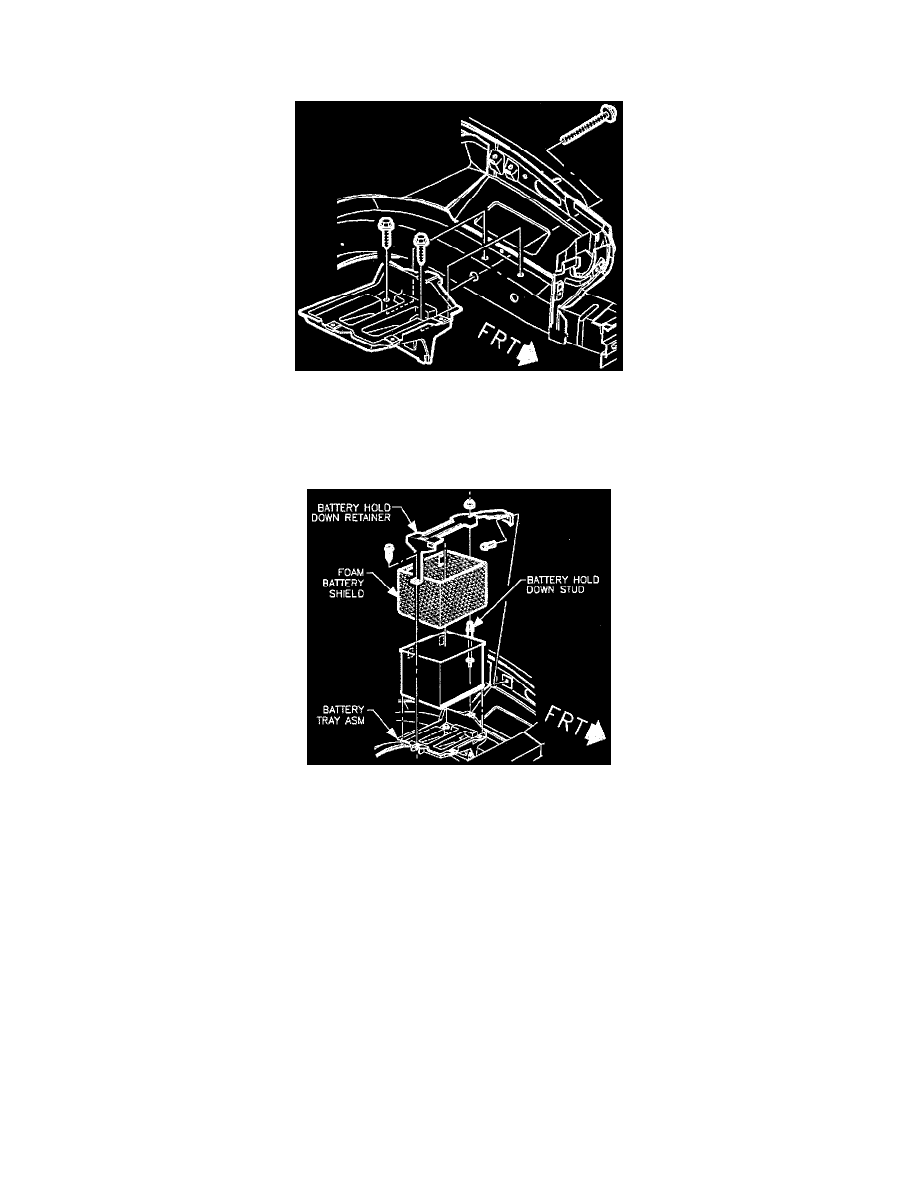
11. Install battery tray.
12. Torque battery tray bolts.
-
Torque: 10 N.m (89 inch lbs).
IMPORTANT: One bolt is located in the fender well.
13. Make sure battery tray is clean.
14. Make sure that the battery cable ends are clean and free of corrosion. (Clean with a wire brush.)
15. Make sure that the battery is in good physical condition (e.g., no cracks, or obvious damage) and that the terminals are clean.
16. Install battery carefully in the battery tray; make sure that the terminals do not short against any metal during the installation.
17. Install the battery hold-down retainer, locking the battery into the tray. Install and tighten the hold-down retainer nut and screw.
-
Torque: 9 N.m (80 inch lbs).
18. Install the positive battery cable first.
-
Torque: 17 N.m (151 inch lbs).
19. Install the negative battery cable last.
-
Torque: 17 N.m (151 inch lbs).