
VUE 2WD V6-3.5L VIN 4 (2004)
1. Remove the rear door window. Refer to Window Replacement - Rear Door (See: Service and Repair) .
2. Remove the rear door applique. Refer to Door Frame Applique Replacement - Rear () .
3. Remove the rear door window weatherstrip run channel assembly. Refer toWindow Weatherstrip Run Channel Assembly Replacement - Rear (
See: Window Weatherstrip Run Channel Assembly Replacement - Rear) .
4. Remove the rear door outer panel. Refer to Outer Door Panel Replacement Rear - Bolt On () .
5. Remove the rear door sound insulator. Refer to Sound Insulator Replacement - Rear Door (See: Body and Frame/Doors, Hood and
Trunk/Doors/Rear Door/Rear Door Panel/Service and Repair/Door Insulator) .
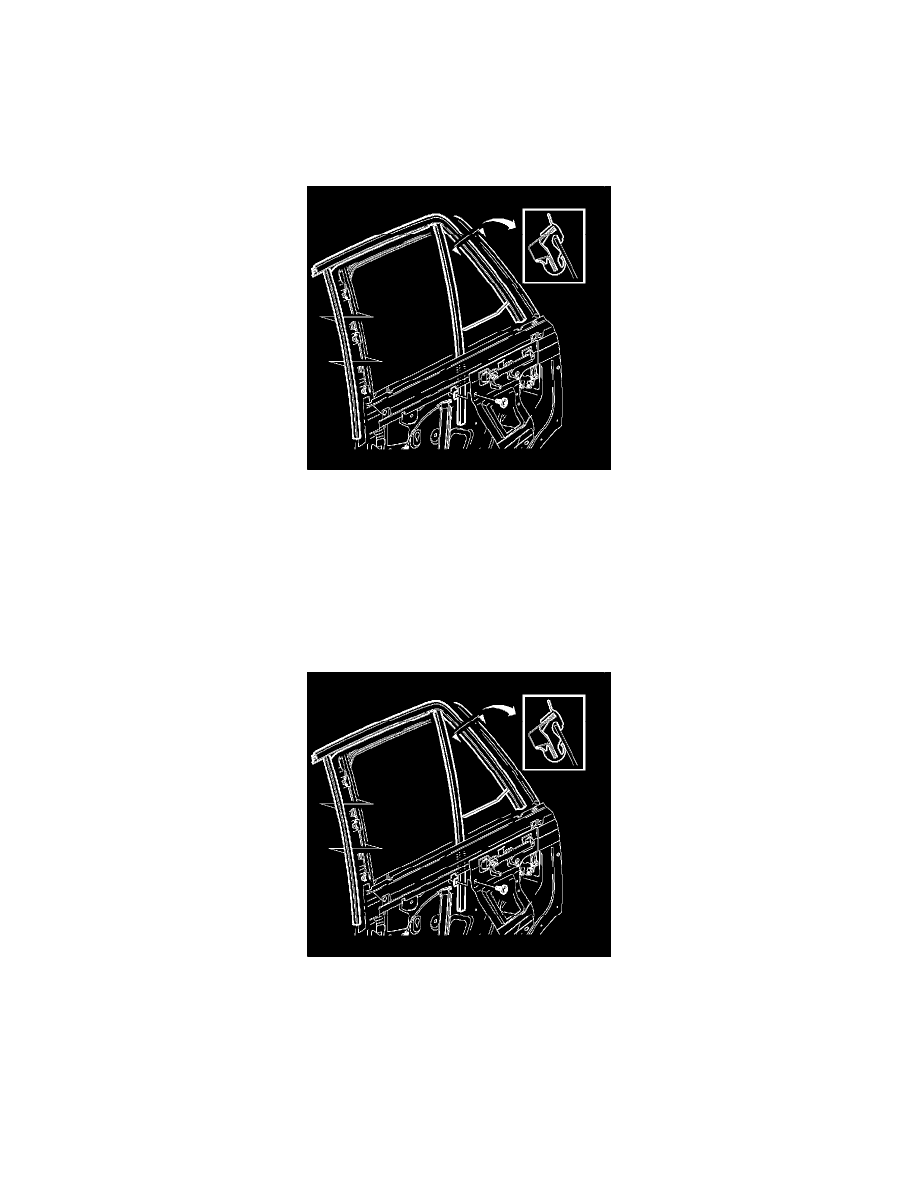
6. Remove the rear door window run channel and fixed glass assembly.
*
Remove the lower bolt from the fixed glass post.
*
Disengage the fixed glass post upper clip from the door frame by using a small screwdriver to press up on the clip.
*
Depress the mushroom retainers at the top ends of the metal glass run channels.
*
Remove the seal leg from the front metal glass run channel.
*
Starting from the front corner of the door, remove the seal from the door header flange.
*
Remove the seal and fixed glass assembly from the door.
Installation Procedure
1. Install the window run channel seal and fixed glass assembly.
*
Place the seal and fixed glass assembly into the door frame.
*
Place the seal assembly on the door header.
*
Install the fixed glass post upper clip to the door frame.
*
Install the front seal leg to the metal glass run channel.
*
Secure the mushroom retainers at the top ends of the metal glass run channels.
*
Install the seal to the door header flange, starting from the front corner.
Notice: Refer to Fastener Notice in Cautions and Notices.