
VUE AWD L4-2.2L VIN D (2005)
8. Place the cage and the inner race into the outer race.
9. Insert the first bearing roller, then tilt the cage in the opposite direction to insert the opposing bearing roller.
10. Repeat this process until all 6 bearing rollers are in place.
11. Using the SA9198C install the CV joint retaining ring to the wheel drive shaft bar.
12. Place approximately half the grease from the service kit inside the outboard seal and pack the CV joint with the remaining grease.
13. Place a block of wood against the CV joint spindle and tap on the block of wood until the CV joint inner race engages the retaining ring.
14. Slide the large diameter of the seal over the outside of the CV race and locate the lip of the seal in the housing groove.
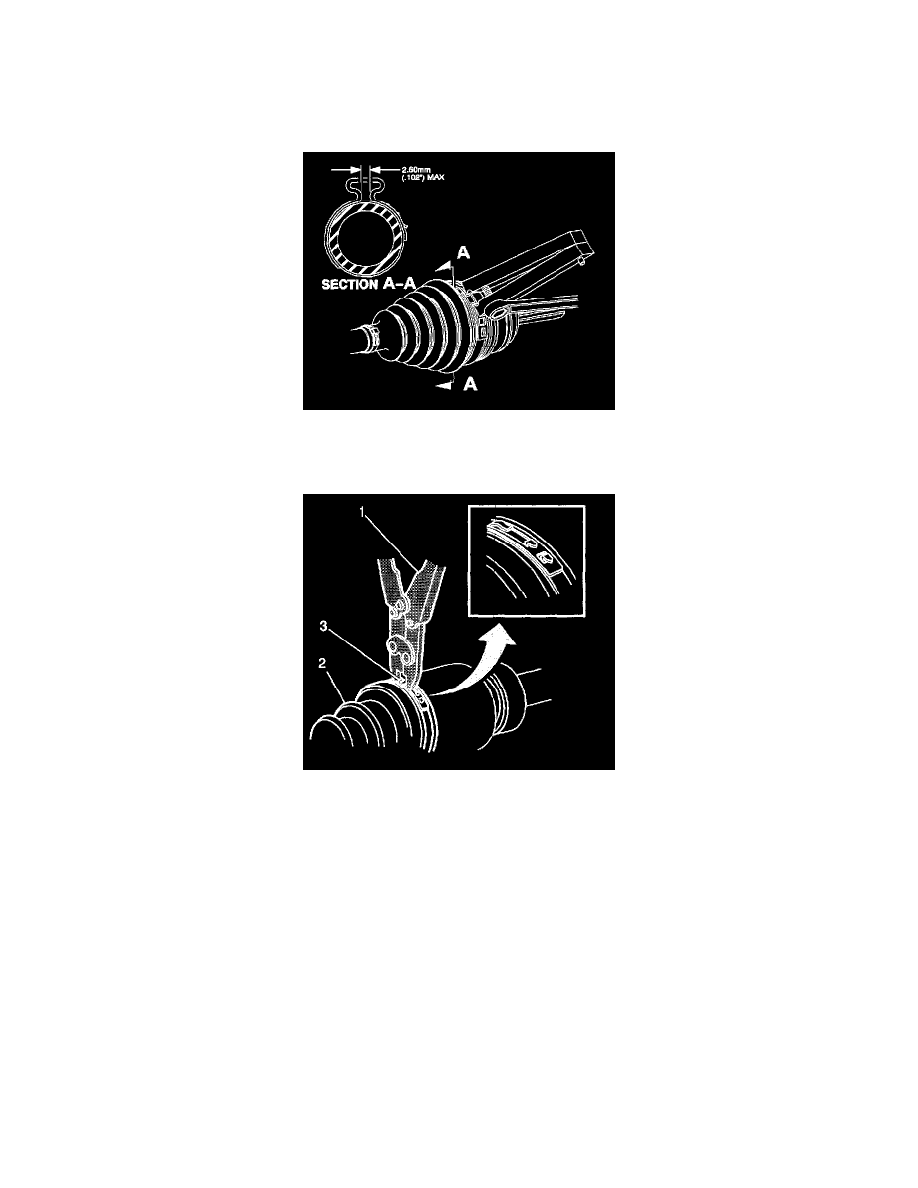
15. Install the large seal retaining clamp over the seal.
16. Align the following items while latching:
16.1. The wheel drive shaft outboard seal (1)
16.2. The CV joint outer race
16.3. The large seal retaining clip (2)
17. Using the SA9203C (1), latch the large seal retaining clamp (2). Ensure that the latching tangs are fully engaged in the large seal clamp band.
18. Remove the wheel drive shaft from the bench vise.
19. Distribute the grease within the outer CV joint by rotating the joint in a circular motion tour to five times.
Rear
Wheel Drive Shaft Outer Joint and Seal Replacement - Rear
-
Tools Required
-
SA9161C Axle Boot Clamp Installer
-
SA9198C Snap Ring Pliers (Constant Velocity Joint)
-
SA9203C Axle Clamp Installer
Disassembly Procedure