
VUE AWD V6-3.5L (2007)
Brake Rotor/Disc: Removal and Replacement
Brake Pad and Rotor Burnishing
Brake Pad and Rotor Burnishing
Caution: Road test a vehicle under safe conditions and while obeying all traffic laws. Do not attempt any maneuvers that could jeopardize
vehicle control. Failure to adhere to these precautions could lead to serious personal injury and vehicle damage.
Caution: Refer to Brake Dust Caution.
Burnishing the brake pads and brake rotors is necessary in order to ensure that the braking surfaces are properly prepared after service has been
performed on the disc brake system.
This procedure should be performed whenever the disc brake rotors have been refinished or replaced, and/or whenever the disc brake pads have been
replaced.
1. Select a smooth road with little or no traffic.
2. Accelerate the vehicle to 48 km/h (30 mph).
Important: Use care to avoid overheating the brakes while performing this step.
3. Using moderate to firm pressure, apply the brakes to bring the vehicle to a stop. Do not allow the brakes to lock.
4. Repeat steps 2 and 3 until approximately 20 stops have been completed. Allow sufficient cooling periods between stops in order to properly
burnish the brake pads and rotors.
Brake Rotor Replacement
Brake Rotor Replacement
Tools Required
*
J 41013 Rotor Resurfacing Kit
*
J 42450-A Wheel Hub Resurfacing Kit
Caution: Refer to Brake Dust Caution.
Removal Procedure
1. Raise and support the vehicle. Refer to Vehicle Lifting.
2. Remove the tire and wheel assembly.
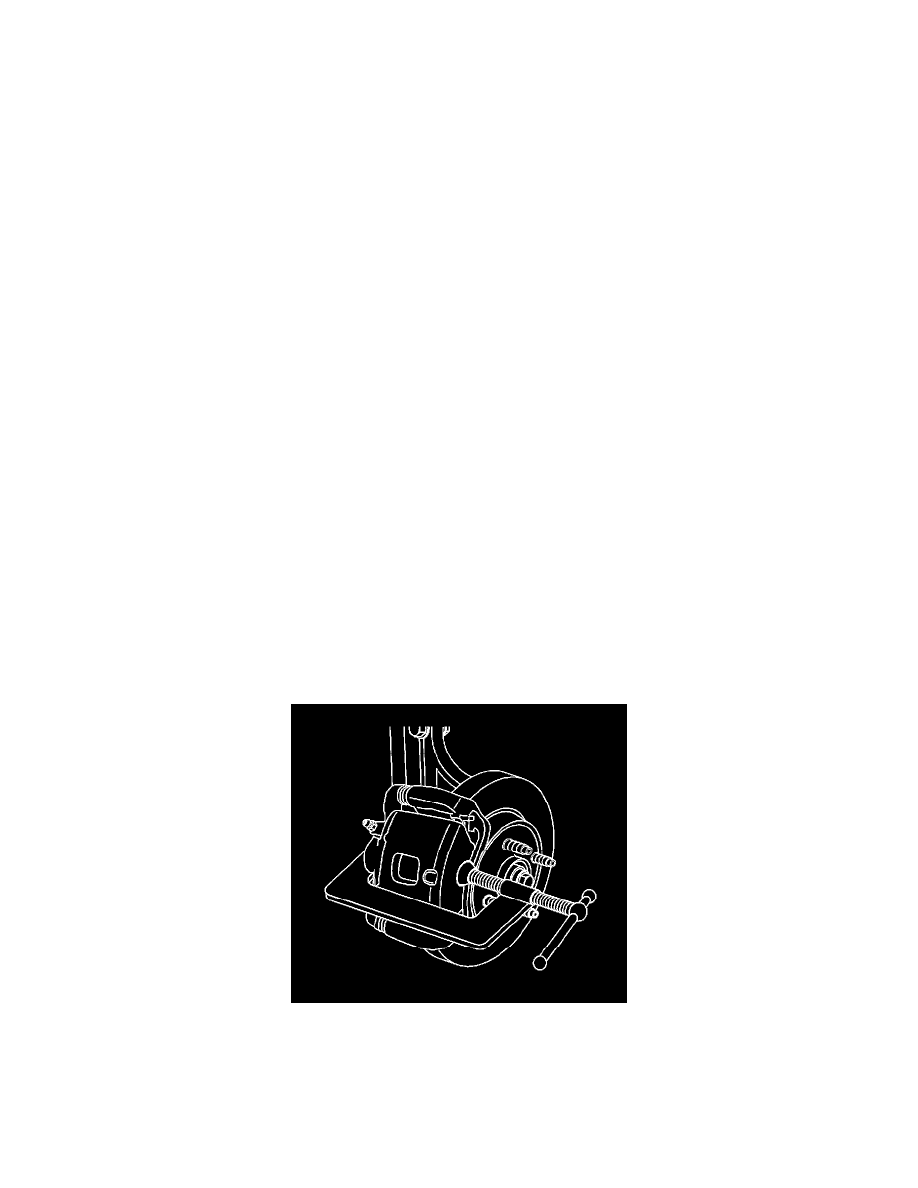
3. Install a C-clamp over the body of the brake caliper, with the C-clamp ends against the rear of the caliper body and the outboard disc brake pad.
4. Tighten the C-clamp until the caliper piston is compressed into the caliper bore enough to allow the caliper to slide past the brake rotor.
5. Remove the C-clamp.