
VUE AWD V6-3.5L (2007)
Shift Solenoid: Service and Repair
1-2 Shift Solenoid Valve Replacement
1-2 Shift Solenoid Valve Replacement
Removal Procedure
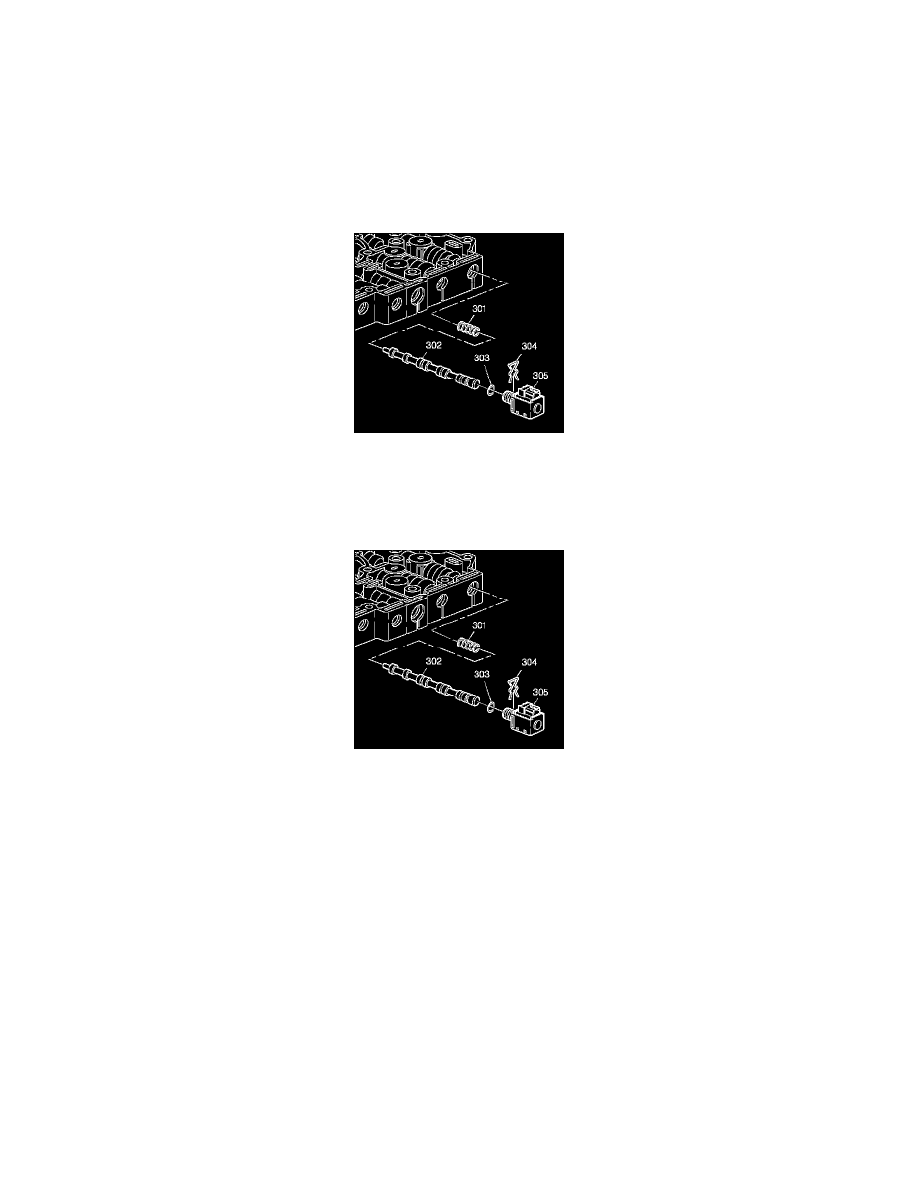
Important: Retainer clips hold in each of the valve line-ups. Use a small screwdriver in order to remove the retainer clips. Be careful not to
score the valve body when removing the retainer clips and valves. Before removing the valve line-ups, inspect each valve line-up for freedom of
movement.
1. Remove the transmission side cover.
2. Remove the 1-2 shift solenoid retainer clip (304), the 1-2 shift solenoid (305) with O-ring (303), the 1-2 shift valve (302), and the 1-2 shift valve
spring (301).
Installation Procedure
1. Install the 1-2 shift valve spring (301), the 1-2 shift valve (302), the 1-2 shift solenoid (305) with O-ring (303) and the 1-2 shift solenoid retainer
clip (304).
2. Install the transmission side cover.
Important: It is recommended that transmission adaptive pressure (TAP) information be reset.
Resetting the TAP values using a scan tool will erase all learned values in all cells. As a result, The ECM, PCM or TCM will need to
relearn TAP values. Transmission performance may be affected as new TAP values are learned.
3. Reset the TAP values.