
VUE AWD V6-3.5L VIN 4 (2004)
Note:
Always use care when removing a terminal position assurance (TPA) retainer in order to avoid damaging it.
6.
Remove the TPA by inserting a small flat-blade tool into the small slot on the TPA retainer and pushing down until the TPA retainer releases.
Gently pry the TPA retainer out of the connector.
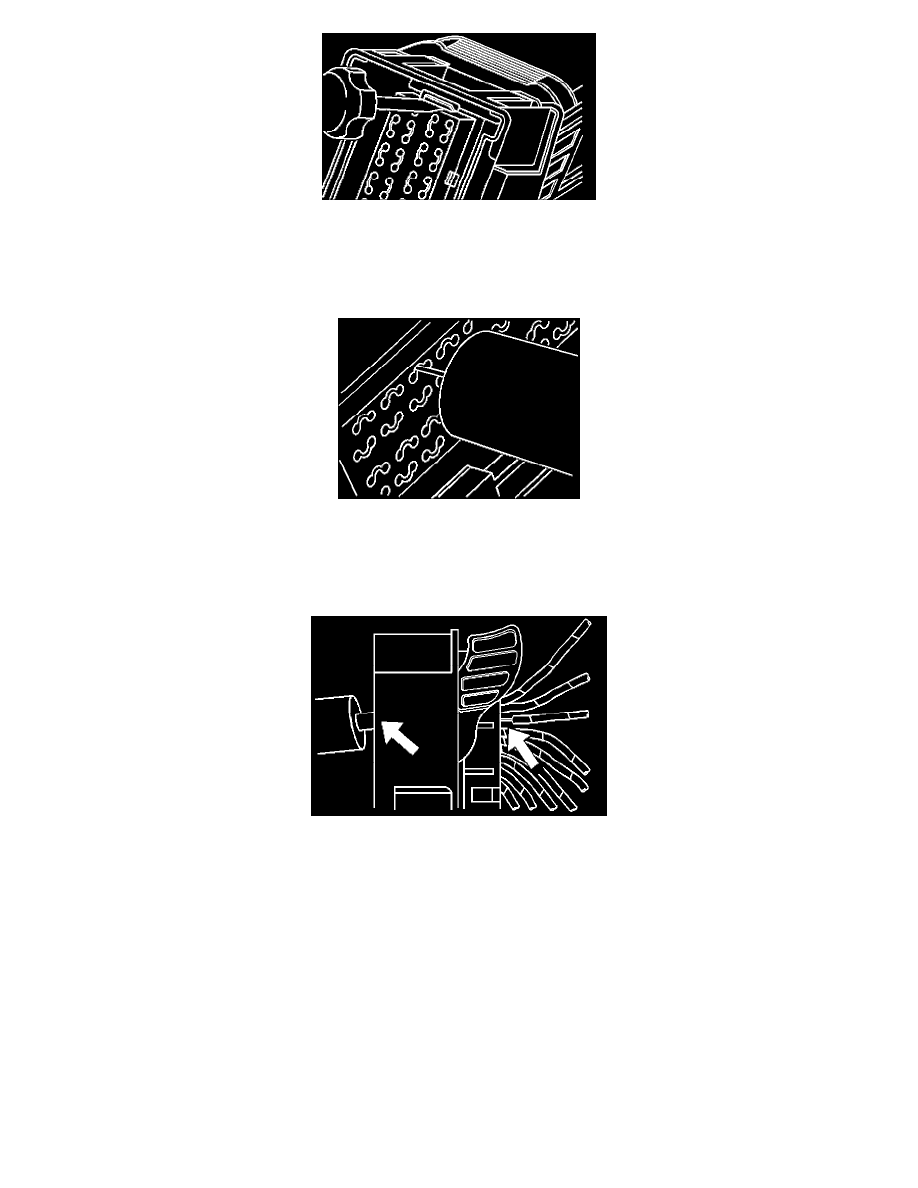
Note:
Do not angle or rock the J 38125-21 tool when inserting it into the connector to avoid tool or connector damage.
7.
Insert the J 38125-21 tool (Delphi 15381651-2, into the round canal between the terminal cavities at the front of the connector. (See the release
tool cross reference in the Reference Guide of the Terminal Repair Kit to ensure that the correct release tool is used.)
Note:
Never use force to pull a terminal out of a connector to avoid damaging the terminal or connector.
8.
While holding the J 38125-21 removal tool in place, gently pull the wire out of the back of the connector.
Terminal Replacement
Installing New Electrical Lead Kit
Important:
Use only Saturn/GM splice sleeves. Other splice sleeves may not protect the splice from moisture or provide a good electrical connection.
1.
Open the harness.
^
If the harness is taped, remove the tape.
^
To avoid wiring insulation damage, use a sewing ripper, or equivalent, to cut open the harness.