
VUE AWD V6-3.5L VIN 4 (2004)
Notice:
Tighten the nuts evenly and alternately in a cross or star pattern, in order to avoid excessive runout.
E.
Tighten the wheel nuts in a cross or star pattern.
Tighten
Tighten nuts to 125 Nm (92 lb-ft).
F.
Install the wheel center cap, if equipped.
G.
Install the wheel nut caps, if equipped.
Tighten
Tighten nut caps to 5 Nm (44 lb-in).
7.
Lower the vehicle.
Important:
When measuring alignment angles, it is critical that vehicle bumper heights are within specifications (front: 410 mm +/- 25 mm [16.14 in +/-
0.98 in]; rear: 435 mm +/- 25 mm [17.13 in +/- 0.98 in], measured from lower edge of bumper). If not correct, add or remove weight until
bumper height is correct.
8.
Perform rear alignment.
^
Adjust tire pressure to NEW specifications:
^
Front Tires: 35 psi (241 kPa)
^
Rear Tires: 35 psi (241 kPa)
B.
Install the alignment equipment according to the manufacturer's instructions.
C.
Jounce the front and the rear bumpers three times prior to checking the wheel alignment.
D.
Measure the alignment angles and record the readings.
E.
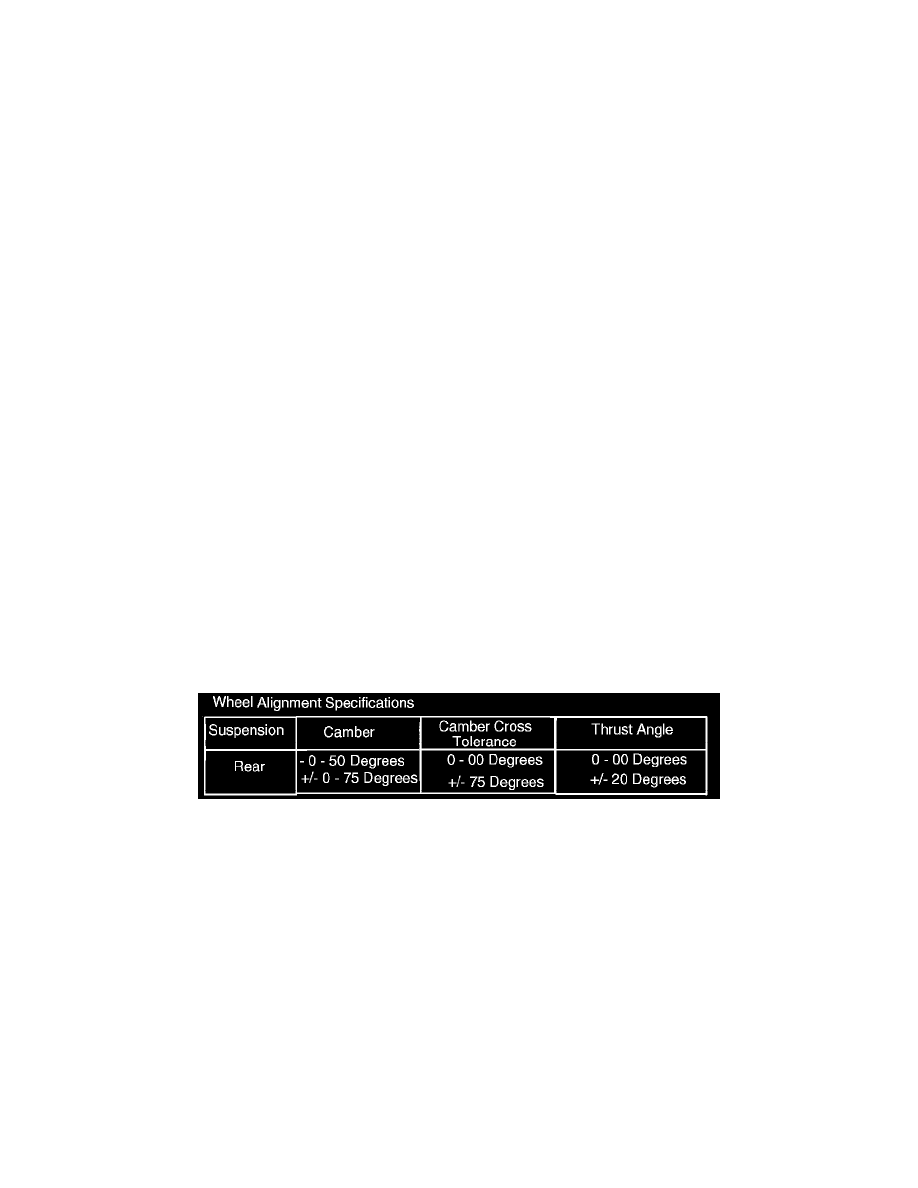
Adjust alignment angles to vehicle specification, if necessary. Refer to Wheel Alignment Specifications table shown. Adjust angles in the
following order: (1st) rear toe; (2nd) rear camber.
9.
After performing rear alignment, with the steering wheel still locked in the center position, check the front toe and adjust if necessary. Front total
toe specification: 0.15° +/- 0.15°.
10.
Open driver's side (left, front) door and locate Vehicle Certification/Tire label.
11.
Clean the surface of the door above the Vehicle Certification/Tire label with a clean dry cloth.
Important:
One pack of 250 labels is included in this shipment. Additional packs can be ordered at win.wallace.com/saturn, item number S03 2004TCL.
Important:
To ensure the label adheres to the surface of the door properly, smooth down the edges of the label and then apply pressure to the label for
approximately 5 seconds.