
VUE FWD V6-3.5L (2008)
Band Apply Servo: Service and Repair
Low/Reverse Servo Assembly Replacement
Low/Reverse Servo Assembly Replacement
Removal Procedure
1. Remove the oil feed pipes. Refer to Oil Feed Pipes Replacement (See: Fluid Line/Hose/Service and Repair) .
2. Remove the 3 low and reverse band servo cover bolts, the servo, and the spring.
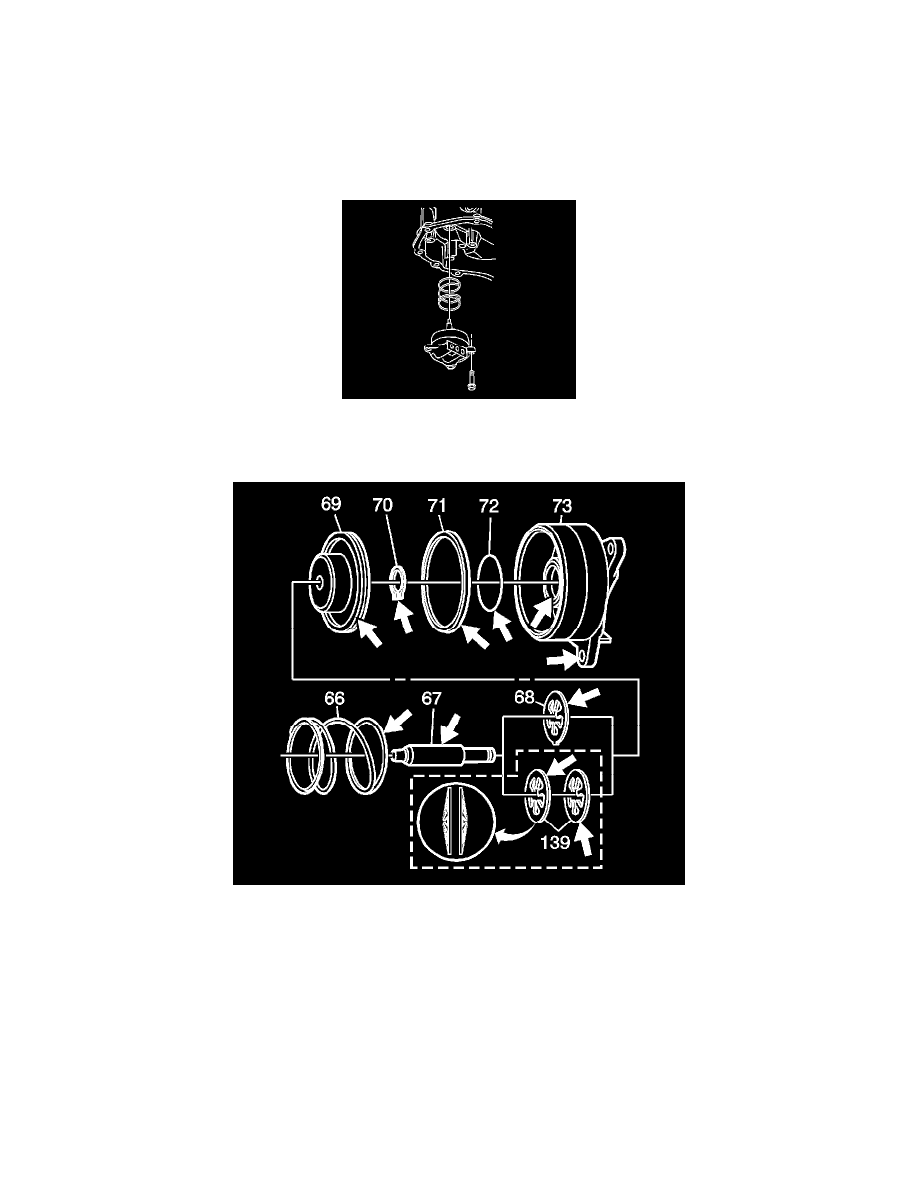
Disassembly Procedure
1. Remove the piston pin assembly (67-70) from the servo cover (73).
2. Remove the snap ring (70) from the servo pin (67).
3. Remove the piston (69) and the servo cushion spring (68), or springs (139), from the servo pin (67).
4. Remove the servo piston seals (71, 72) from the cover (73).
5. Discard the servo piston seals (71 and 72).
6. Inspect all the components for damage.
7. Inspect the fluid feed holes for the proper opening.
8. Inspect the bolt hole threads for debris or stripping.
9. Inspect the seal grooves for damage.
10. Clean and dry each component.
Assembly Procedure