
VUE FWD V6-3.5L (2008)
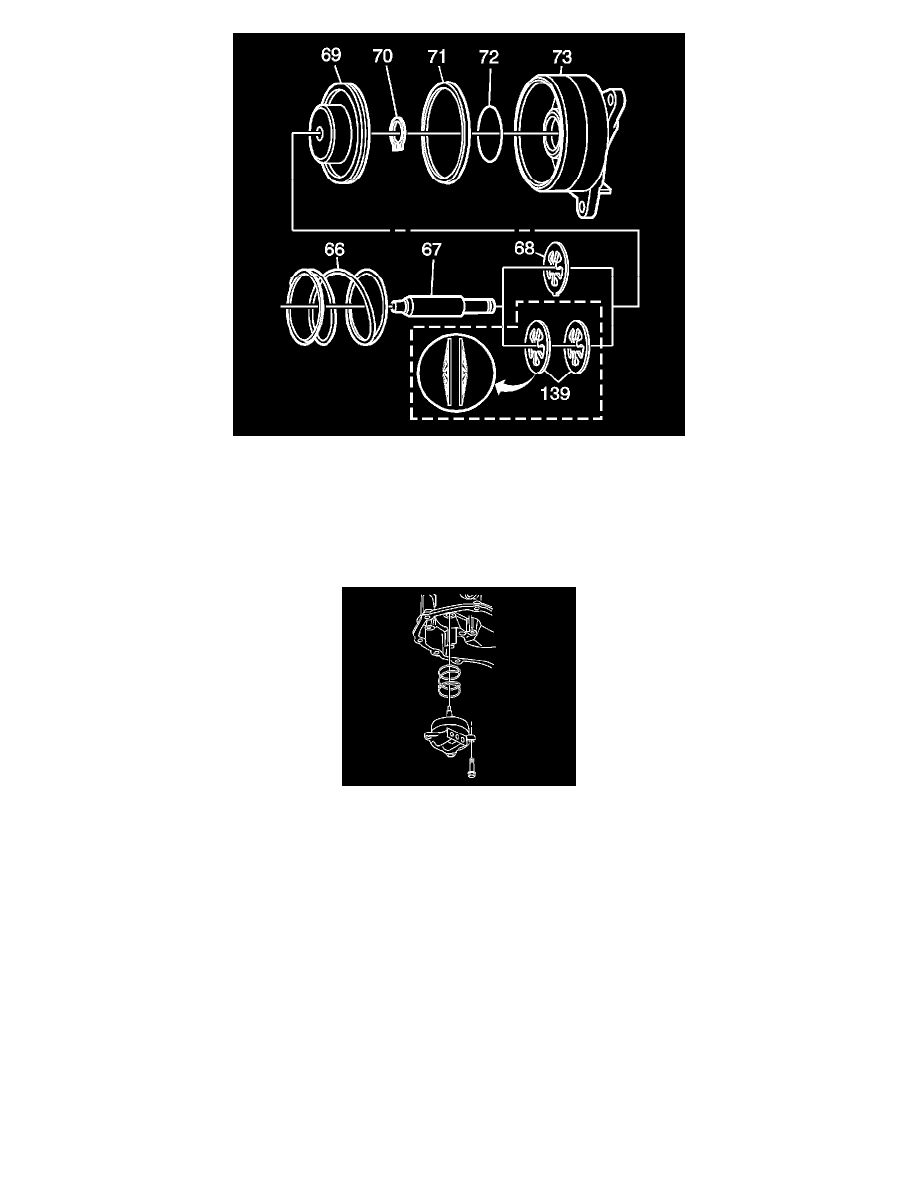
1. Assemble the servo cushion spring (68), or springs (139), and the servo piston (69) onto the servo pin (67).
2. Install the snap ring onto the servo pin (67) in order to retain the servo cushion springs (68) and the servo piston (69).
3. Assemble the new seals (71, 72) onto the servo piston (69) and the servo cover (73).
4. Assemble the servo piston assembly (67-70) into the servo cover (73). Lubricate the piston seals with transmission fluid in order to aid in
assembly.
Installation Procedure
Notice: Refer to Fastener Notice (See: Service Precautions/Vehicle Damage Warnings/Fastener Notice) .
1. Install the low and the reverse band servo cover bolts.
Tighten the bolts to 12 N.m (106 lb in).
2. Install the oil feed pipe. Refer to Oil Feed Pipes Replacement (See: Fluid Line/Hose/Service and Repair) .
Important: It is recommended that transmission adaptive pressure (TAP) information be reset.
Resetting the TAP values using a scan tool will erase all learned values in all cells. As a result, the engine control module (ECM),
powertrain control module (PCM) or transmission control module (TCM) will need to relearn TAP values. Transmission performance
may be affected as new TAP values are learned.
3. Reset the TAP values. Refer to Transmission Adaptive Functions (See: Description and Operation/4T45-E - Automatic Transaxle/Transmission
Adaptive Functions) .