
VUE FWD V6-3.5L (2008)
Tighten the bolt to 22 N.m (16 lb ft).
15. Install the PNP switch. Refer to Park/Neutral Position Switch Replacement (See: Sensors and Switches - A/T/Transmission Position
Switch/Sensor/Service and Repair/4T45-E - Automatic Transaxle) .
16. Install the transmission mount. Refer to Transmission Mount Replacement - Left Side (See: Transmission Mount/Service and Repair/4T45-E -
Automatic Transaxle/Transmission Mount Replacement - Left Side) .
17. If equipped with 2.4L (LAT-2.4L), install the auxiliary fluid pump. Refer to Auxiliary Fluid Pump Replacement (See: Fluid Pump/Service and
Repair/Removal and Replacement/Auxiliary Fluid Pump Replacement) .
18. Raise the vehicle. Refer to Lifting and Jacking the Vehicle (See: Maintenance/Vehicle Lifting/Service and Repair) .
19. Install the left wheel drive shaft to the transmission. Refer to Front Wheel Drive Shaft Replacement (See: Drive Axles, Bearings and Joints/Axle
Shaft Assembly/Service and Repair/Front Wheel Drive Shaft Replacement) .
20. Install the left front splash shield. Refer to Engine Splash Shield Replacement (See: Body and Frame/Splash Guard/Service and Repair) .
21. Install the frame. Refer to Frame Replacement (4T45-E Transmission) (See: Body and Frame/Frame/Subframe/Front Subframe/Service and
Repair/Frame Replacement (4T45-E Transmission))Frame Replacement (6T70 Transmission) (See: Body and Frame/Frame/Subframe/Front
Subframe/Service and Repair/Frame Replacement (6T70 Transmission))Frame Replacement (Getrag 5 Speed Transmission) (See: Body and
Frame/Frame/Subframe/Front Subframe/Service and Repair/Frame Replacement (Getrag 5 Speed Transmission)) .
22. Connect the air cleaner outlet duct to the intake plenum. Refer to Air Cleaner Outlet Duct Replacement (See: Engine, Cooling and
Exhaust/Engine/Tune-up and Engine Performance Checks/Air Cleaner Housing/Air Cleaner Fresh Air Duct/Hose/Service and Repair/Air Cleaner
Outlet Duct Replacement) .
23. Fill the transmission. Refer to Approximate Fluid Capacities (Except Hybrid) (See: Maintenance/Service Intervals)Approximate Fluid Capacities
(Hybrid) (See: Maintenance/Service Intervals) .
Notice: Transmission Auxiliary Pump Priming must be performed after any service procedure is performed on the transmission that involves the
draining of and refill of transmission fluid. Failure to perform the Transmission Auxiliary Pump Priming will result in damage to the auxiliary
pump and possible damage to the transmission.
24. If equipped with 2.4L (LAT-2.4L), using a scan tool, prime the transmission auxiliary pump.
Control Valve Body Cover Gasket Replacement
Control Valve Body Cover Gasket Replacement
Removal Procedure
1. Remove the transmission side cover. Refer to Control Valve Body Cover Replacement (See: Control Valve Body Cover Replacement) .
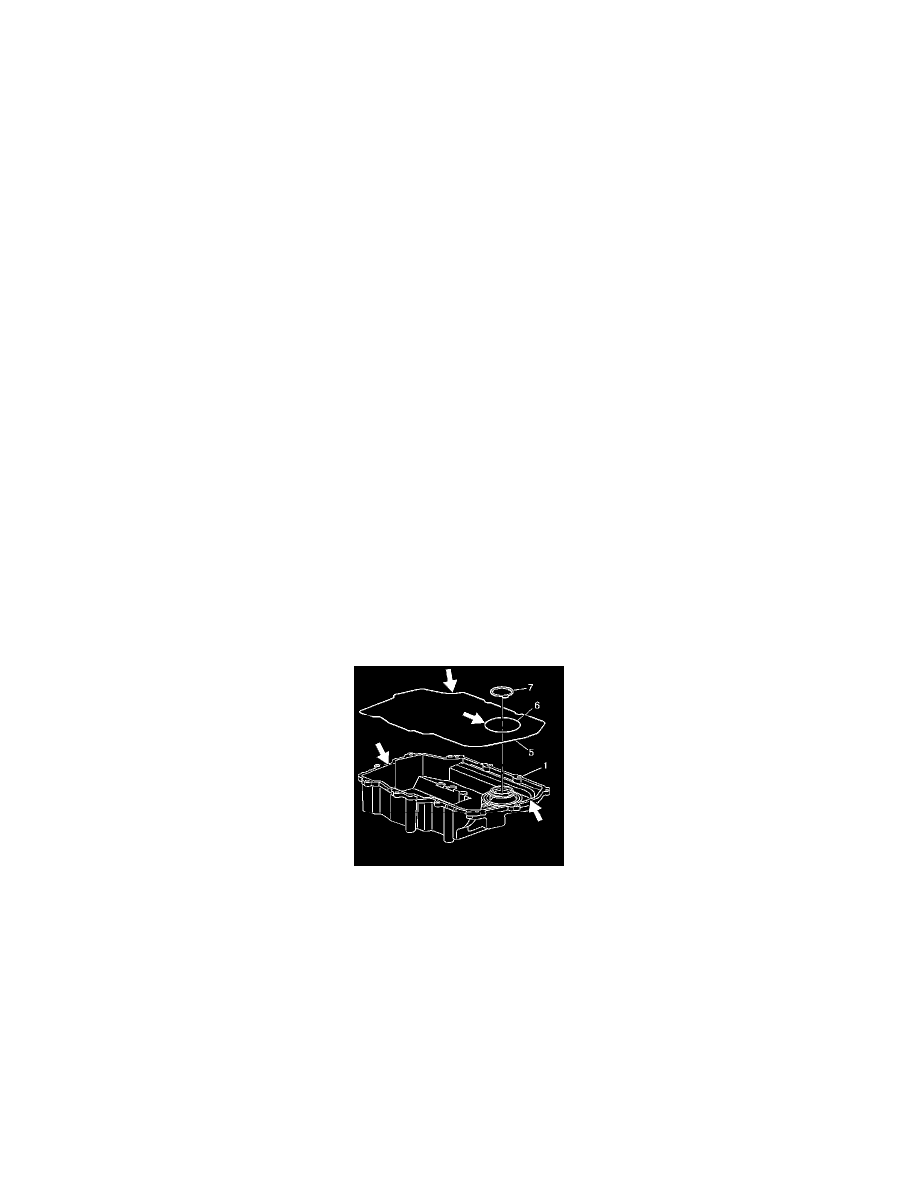
2. Remove the side cover gaskets (5 and 6) and the thrust washer (7) from the side cover (1).
3. Inspect the side cover for cracks or damage to the seal grooves and mounting bosses.
4. Inspect the side cover seals for damage. The side cover seals are reusable if not damaged.
5. Thoroughly clean the side cover and the side cover seals. Clean and dry the seal grooves and the axle seal bore.
Installation Procedure