
VUE FWD V6-3.6L Hybrid (2009)
Variable Valve Timing Solenoid: Service and Repair
Camshaft Position Actuator Solenoid Valve Solenoid Replacement - Bank 1 (Right Side) Exhaust
Camshaft Position Actuator Solenoid Valve Solenoid Replacement - Bank 1 (Right Side) Exhaust
Removal Procedure
1. Remove the air cleaner assembly. Refer to Air Cleaner Assembly Replacement (See: Tune-up and Engine Performance Checks/Air Cleaner
Housing/Service and Repair).
2. Remove the engine control module. Refer to Engine Control Module Replacement (See: Powertrain Management/Computers and Control
Systems/Engine Control Module/Service and Repair).
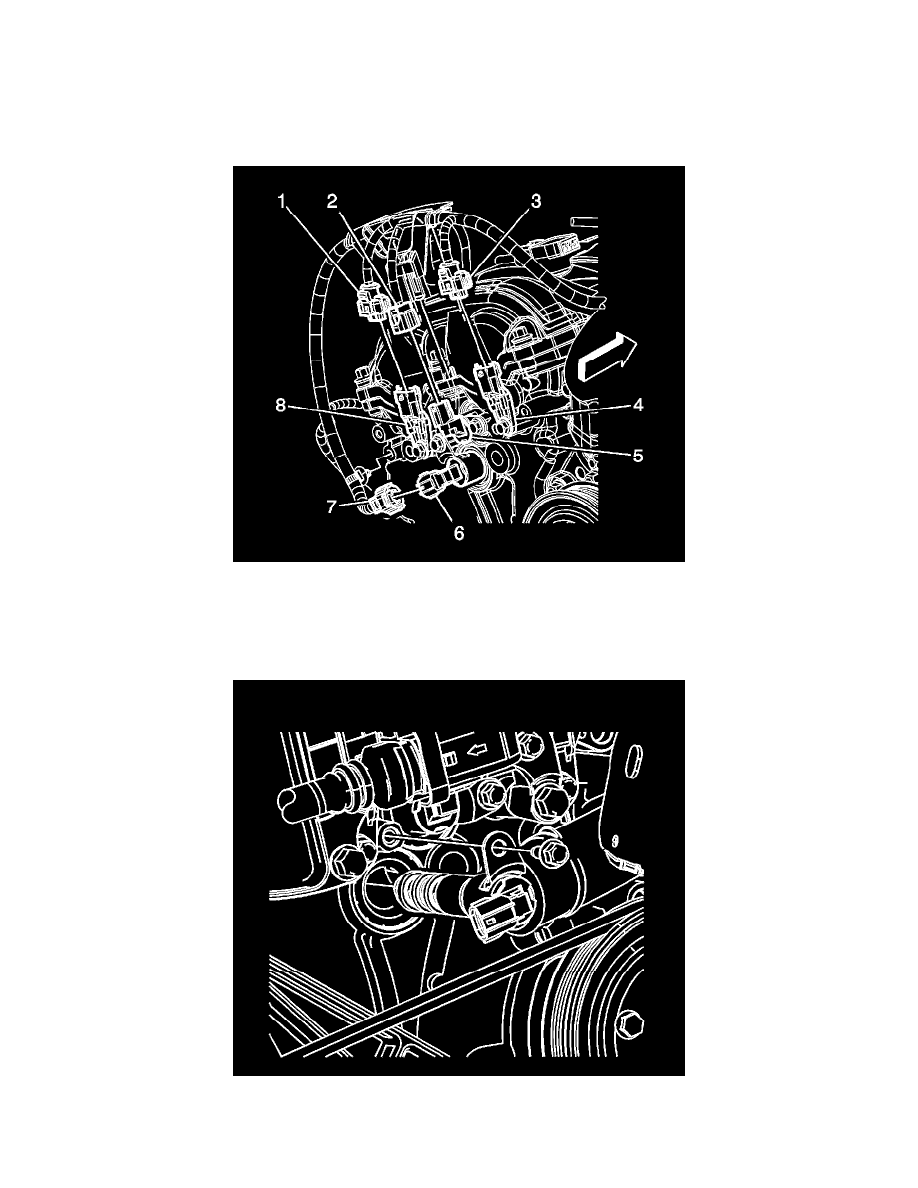
3. Disconnect the engine wiring harness electrical connector (7) from the bank 1 exhaust camshaft position (CMP) actuator solenoid valve (6).
4. Remove the CMP actuator solenoid valve bolt.
5. Remove the CMP actuator solenoid valve.
6. Inspect the CMP actuator solenoid valve seal and replace as necessary.