
VUE FWD V6-3.6L Hybrid (2009)
3. On a new fuel rail, lubricate the fuel injector cups with silicon free engine oil GM P/N 12345610 (Canadian P/N 9931930) or equivalent.
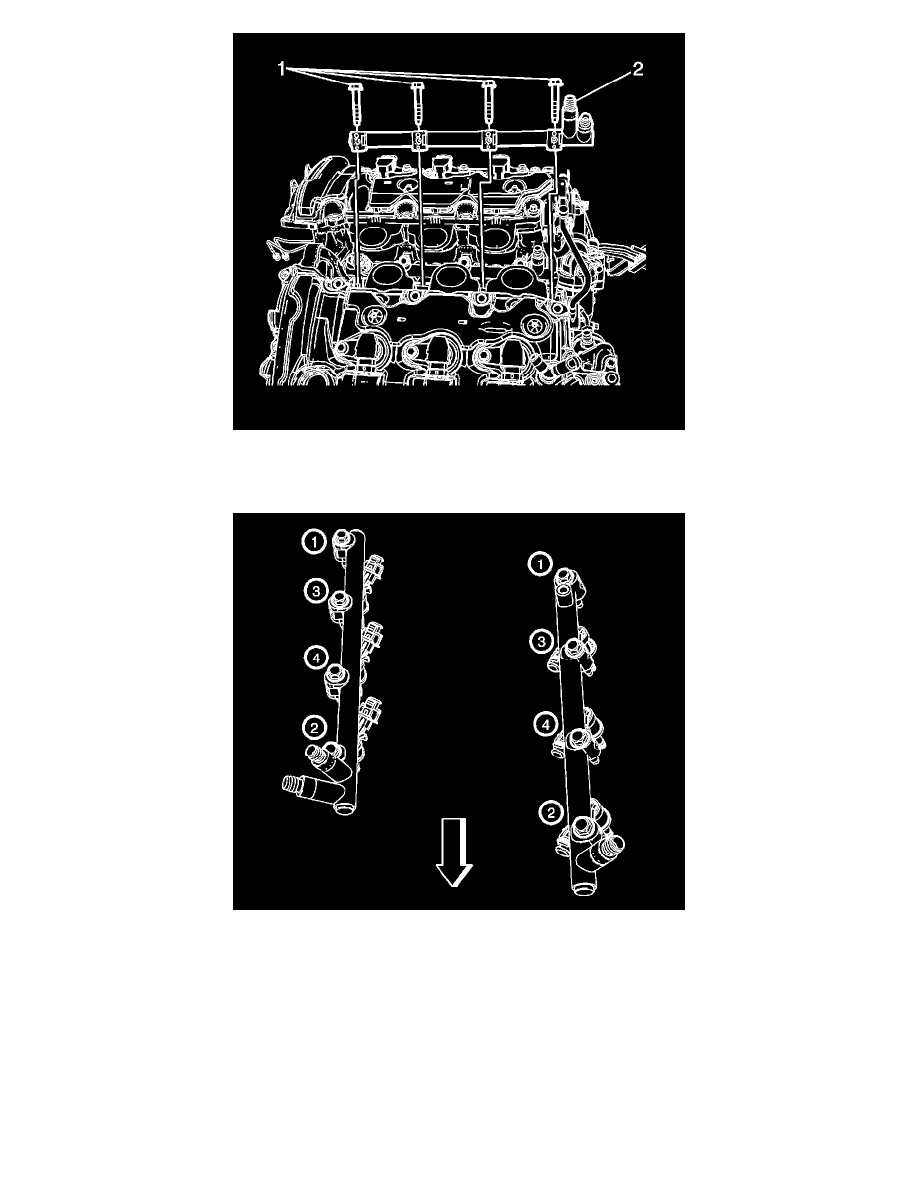
4. Carefully place the fuel rail (2) into position, placing the front into the fuel rail over the front injector and rotating the rear downward.
5. Install the 2 outer fuel rail bolts first, then the 2 inner bolts, and hand tighten.
Caution: Refer to Fastener Caution (See: Service Precautions/Vehicle Damage Warnings/Fastener Caution).
6. Tighten the fuel rail bolts in the sequence shown:
1. Tighten the Bank 1 fuel rail bolts first pass to 12 Nm (106 lb in).
2. Tighten the Bank 1 fuel rail bolts final pass to 23 Nm (17 lb ft).
7. Install a NEW fuel rail crossover tube. Refer to Fuel Injection Fuel Rail Crossover Tube Replacement (See: Fuel Injection Fuel Rail Crossover
Tube Replacement).
8. Install a NEW high pressure fuel pipe. Refer to Fuel Feed Intermediate Pipe Replacement (See: Fuel Supply Line/Service and Repair).
9. Install the high pressure fuel sensor (1). Refer to Fuel Pressure Sensor Replacement (See: Fuel Pressure Sensor/Switch/Service and Repair).