SEAT Workshop Service and Repair Manuals
HOME
FEATURES
MENU
INDEX
ABOUT US
Selector lever: dismantling and assembling (vehicles up to 06.00)|Installation >
< Selector lever: dismantling and assembling (vehicles up to 06.00)
Leon Mk2
001 Automatic gearbox
Automatic gearbox, control, assembly, housing
Gear drive mechanism: repairing / lector_lever_dismantling_and_assembling_(vehicles_up_to_06.00)/removal/">Selector lever: dismantling and assembling (vehicles up to 06.00)
Removal
Removal
Removal
–
Disconnect the battery earth strap.
Note!
For vehicles fitted with a coded radio, first check the anti-theft code.
–
Move the selector lever to “P”.
–
Remove the gear selector knob by loosening the lateral securing bolt
-arrow-
.
–
Remove the trim sleeve.
–
Remove the selector lever cover by levering first from behind and then remove from the front groove with selector lever in “1”.
–
Removing the centre console:
→ Bodywork repairs, installation work, interior; Repair group 68; Shelves, trims, covers and trays.
–
Remove the selector lever cable safety washer.
–
Turn the locking lever downwards
-arrow 1-
, and release the selector lever cable
-arrow 2-
.
–
Release the wiring harness from the clips on the selector lever box and the cable clips
-arrows-
.
–
Raise the vehicle.
–
Remove the front part of the exhaust pipe with catalytic converter:
→ Rep. Gr.26
.
–
Remove the front heat shield.
–
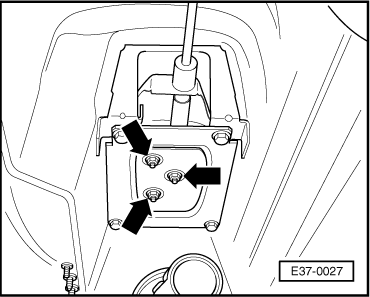
Unscrew the attachment nuts from the centre console -arrows-.
–
Move the selector lever to “1”.
–
Remove the gear selector assembly from the selector lever box.
001 Automatic gearbox
Automatic gearbox, control, assembly, housing
Gear drive mechanism: repairing / lector_lever_dismantling_and_assembling_(vehicles_up_to_06.00)/removal/">Selector lever: dismantling and assembling (vehicles up to 06.00)
Removal
Selector lever: dismantling and assembling (vehicles up to 06.00)|Installation >
< Selector lever: dismantling and assembling (vehicles up to 06.00)
 Note!
Note!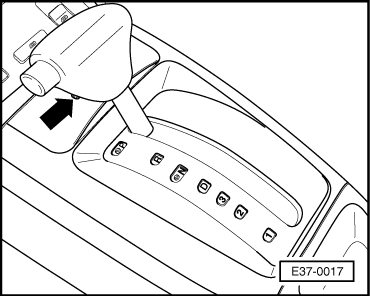


 Note!
Note!