| Installation is carried out in the reverse sequence; note the following: |

Note | t
| Always replace self-locking nuts and bolts during assembly. |
| t
| Replace bolts that are submitted to goniometric tightening, along with seals and gaskets. |
| t
| All cable clamps that become loose or cut when removing must be re-installed in the same place when installing. |
| t
| Clean the cogs of the input shaft and, if the clutch plates are worn, also the hub cogs; eliminate corrosion and apply a very fine layer of lubricating grease to the cogs → Spare parts catalogue. Then move the clutch plate on the input shaft from side to side, until the hub moves smoothly on the shaft. It is essential to remove excess grease. |
| –
| Check whether there are adjusting sleeves in the engine for centring the engine/gearbox assembly and fit if necessary. |
| –
| Ensure that intermediate plate is connected to the sealing flange and housed in the dowel sleeves. |
| –
| Check that clutch plate is centred. |
| –
| Check clutch release collar for wear and replace if necessary. |
| –
| Lubricate the contact points between the clutch release lever and the spherical pivot with grease → Spare parts catalogue. |
Note | When lifting the gearbox, care should be taken not to damage any cables and pipes. |
| –
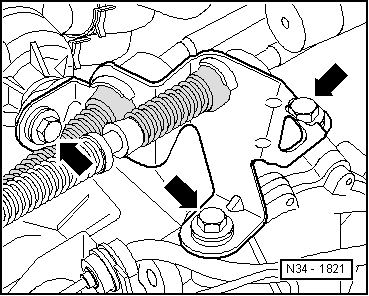
| Swing gearbox forwards on adjustment spindle. |
|
|
|