seat Workshop Repair Guides

SEAT Workshop Service and Repair Manuals

Differential: Adjust > < Differential: Disassembling and assembling
Operation process
Operation process
   
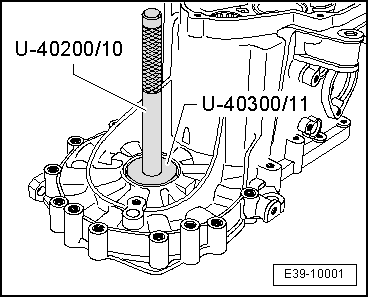
Remove the outer track of the conical roller bearing
  Note
t  The procedure and tools needed to remove the secondary shaft rear bearings outer tracks, are identical in the gearbox casing and the clutch housing.
t  To remove the outer track of the clutch housing, first remove the socket for right hand flanged shaft
  E39-10001
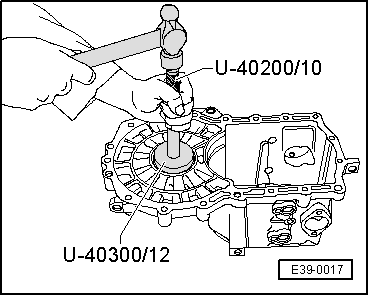
Install the outer track of the conical roller bearing
  Note
The procedure and tools needed to install the secondary shaft rear bearings outer tracks, are identical in the gearbox casing and the clutch housing.
  E39-0017
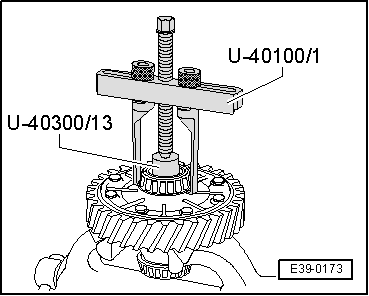
Removing the roller bearing
  Note
The procedure and tools needed to remove the secondary shaft rear bearings outer tracks, are identical in the gearbox casing and the clutch housing.
–  Locate adapter -U-40300/13- on differential.
–  Place adapter -U-40100/1- on adapter -U-40300/13-, ensuring that the claws are inserted into the notches in the differential casing. Remove the bearing.
  Note
If the bearing cage breaks during the extraction then use the kit -T20022- to remove the inner ring of the bearing.
  E39-0173
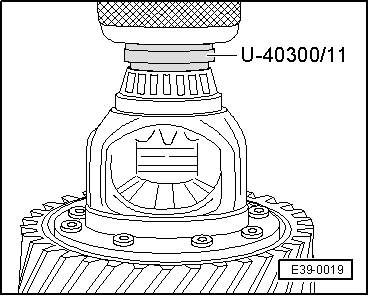
Install the roller bearing
  Note
t  The procedure and tools needed to remove the roller bearings are identical for both sides of the differential box.
t  Before installing the bearing in the differential casing heat with electro-blower -SAT 1416- to 100 ºC. The temperature can be checked with digital thermometer -SAT 4002-.
–  Place adapter -U-40300/13- in a press.
–  Place differential assembly on the tool adapter -U-40300/13-.
–  Place adapter -U-40300/11- with side -B- facing the bearing, on the differential assembly.
  E39-0019
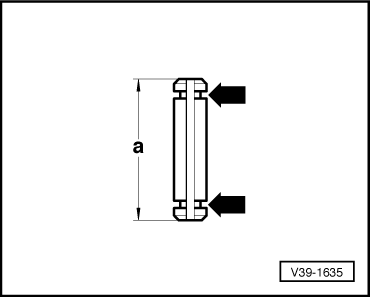
Spring pin identification
  V39-1635
Dim. „a“ mmIdentification
28.5 (short spring pin)
Removing and installing → Fig.
Circumferential groove -arrows-
36.0 (long spring pin),
Removing → Fig.,
Installing → Fig.
No circumferential groove

   
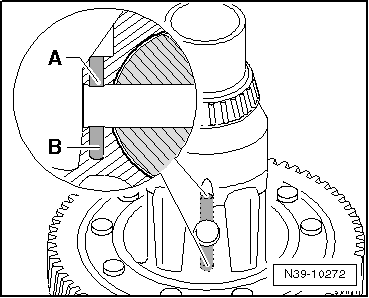
Allocation of differential cages
–  Check hole for spring pin in the gearbox housing.
The hole in the differential cage was modified for the longer spring pin.
  N39-10272
BoreLength of spring pin (mm):
-A-28.5 (short spring pin)
-A- and -B-36.0 (long spring pin)

   
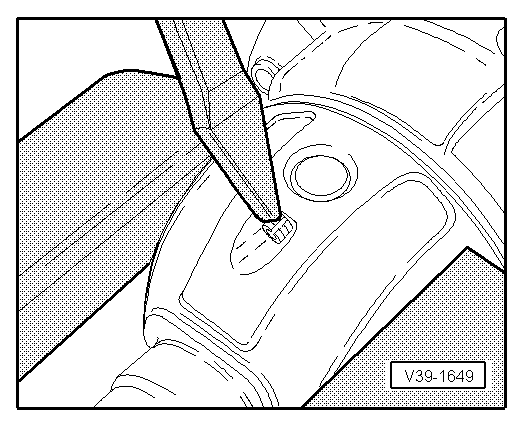
Spring pin with circumferential groove (short spring pin): Removing and installing
Detaching
–  Cover tapered roller bearing inner race and speedometer drive gear to avoid possible damage and ingress of metal particles.
–  Drive out the spring pin with a chisel pressing the groove.
Installation
–  Drive into differential cage to stop.
  V39-1649
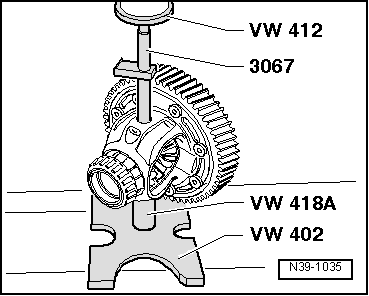
Remove the spring pin without annular groove (long spring pin): Removing differential pinion pin
When removing this, the fastening sleeve must be cut-off.
–  Drive remainder of spring pin out of differential cage.
  N39-1035
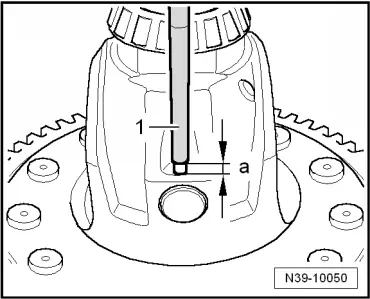
Installing spring pin without circumferential groove (long spring pin)
–  Align hole in differential pinion pin with hole in differential cage.
–  Press a new spring pin in with drift -1- until dimension -a- = 3.0 mm is attained.
l  The spring pin must not come in contact with gears with differential cage installed.
  N39-10050
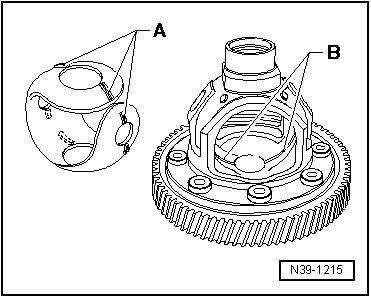
In some gearboxes, the one-piece thrust washer has a shoulder -A- near the holes
In this case, the differential cage has a circumferential groove -B-.
–  Lubricate one piece thrust washer with gear oil and install.
–  Install one-piece thrust washer so that it engages in groove -B- in differential cage.
  N39-1215
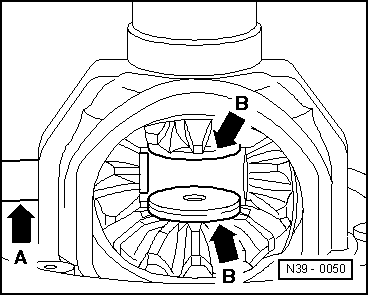
Installing differential bevel gears and differential pinion pin
–  Lubricate one piece thrust washer with gear oil and install.
–  Install both sun wheels and secure (e.g. with flange shaft).
–  Insert planet pinions offset 180° and pivot into position.
–  Press in differential pinion pin (-arrow A-) to first planet pinion.
–  Place threaded pieces -arrows B- in sun gears.
Installation position: Edge facing the large planetary gear.
–  Drive differential pinion pin into final position and secure with spring pin.
  N39-0050
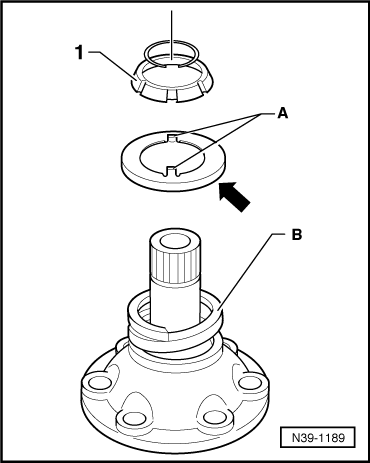
Installation position of thrust washer for tapered ring -1-
Collar -arrow- faces spring -B-.
Some gearbox versions have projections -A-.
The projections -A- face towards tapered ring -1-.
  N39-1189

Differential: Adjust > < Differential: Disassembling and assembling