seat Workshop Repair Guides

SEAT Workshop Service and Repair Manuals

Tightening torques > < Removal:
Installation
Installation
Install in reverse order of removal, observing the following:
   
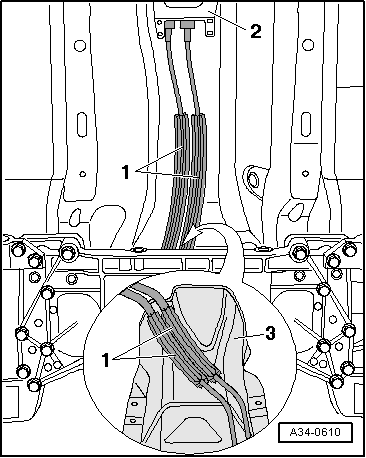
–  The control cables -1 and 2- must be parallel, and must not be crossed at all.
–  The control cables must be positioned in the intended opening in the heat shield -3-.
  Note
The heat shield is shown from above in this detail.
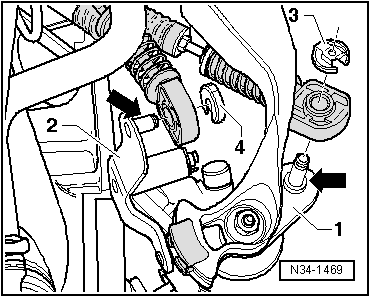
The holes in the cable end-pieces have different diameters.
  A34-0610
–  Apply a little grease → Spare parts catalogueon the pivot -arrows- of the selector rod-1- and the idler rod -2-.
–  Always renew securing clips -3- and -4- after removing each time.
–  Secure the shift cable with safety washer -3- and the selection cable with safety washer -4-.
Fastening element with the plastic idler rod
–  The idler rod and the cable fastening element must be fitted together → Chapter.
–  Insert the selector cable in the fastening element.
Continued for all selector mechanisms
–  Align selector housing parallel to body.
–  Adjust selector mechanism → Chapter.
–  Install central console → Bodywork, interior work; Rep. gr.68.
–  Install knob with gear lever cover → Chapter.
–  Install exhaust system and align without tensioning → Exhaust system; Rep. gr.26.
–  Install battery → Electrical system; Rep. gr.27.
  N34-1469

Tightening torques > < Removal: