
Leon Mk2
 WARNING
| – | Lower the window pane half way. |
| – | Switch off the ignition and all the electrical components. |
| – | With the ignition switched off, disconnect the earth lead from the battery → Starter motor, voltage supply; Rep. gr.27. |
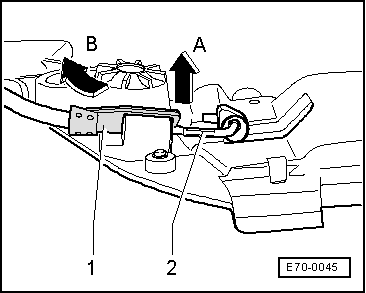
| – | Remove interior trim -1- using the lever -U 30800-. |
| – | Remove the plug connector for electric mirrors -2-. |
| – | Remove the lock cylinder casing → Front doors/ parts/central locking system; Rep. gr.57. |
| – | Remove the loudspeaker grille -12- using the lever -U 30800-. |
| – | Detach lining cover in the door -13- using the lever -U 30800-. |
| – | Unscrew bolts -10- (2x). |
| – | Detach upper connector cover -11-using lever -U 30800-. |
| – | Disconnect the plug connector of the electric window lifters. |
| – | Unscrew bolts -8- (2x). |
| – | Detach the upholstery of the trim -9- using removal pliers -T20065-, starting with the upper part. |
| – | Loosen the window clamps and remove glass → Windows; Rep. gr.64. |
| – | Unscrew bolts -5- (4x) of loudspeaker -7-. |
| – | Remove the loudspeaker -7-and disconnect the connector. |
| – | Unscrew bolts -4- (2x). |
| – | Unscrew bolts -6- (5x). |
| – | Unscrew bolts -14- (2x). |
| – | Remove front panel lining -3- from door by raising it and extracting it towards the door hinge side. |
|
|

| – | Undo fastening clips-7- from door -8-. |
| – | Detach connector from the tweeter - 10-. |
| – | Unscrew bolts -9-. |
| – | Remove the window riser mechanism from the front panel lining of the door -1- . |
| – | Undo the bolts -5- and remove the airbag sensor. |
| – | Disconnect the connector -4- of the lock -3-. |
| – | Remove the led -2-. |
| – | Remove the cable harness from its fixing on the front door panel lining -1-. |
 Note
Note| Insert a protective device between the surface where the trim should be lent against and its contact surface to prevent the possibility of dirt entering. |