seat Workshop Repair Guides

SEAT Workshop Service and Repair Manuals

Roof lining, fitting > < Roof lining: removal and assembly
Roof lining, removal
  WARNING
Before working on the electrical system, disconnect the battery earth strap.
  Note
t  When the battery is reconnected check the vehicle equipment (radio, clock, power windows), following the indications in the Operating Instructions.
t  Removal and assembly will be carried out taking into consideration small differences depending on the vehicle's equipment.
t  To avoid stains use gloves when removing roof linings.
–  Switch off the ignition and all the electrical components.
–  Disconnect the vehicle battery → Starter motor, voltage supply; Rep. gr.27.
–  Remove upper linings from struts A → Chapter.
–  Remove upper linings from struts B → Chapter.
–  Remove upper linings from struts C → Chapter.
   
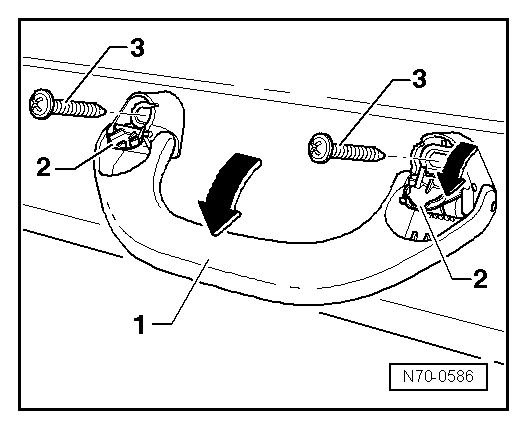
Dismount handgrips
–  Open the covers -2- downwards -arrow- using the lever -U 30800-.
–  Loosen bolts -3- tightening torque 2 Nm and remove hand grip -1-.
–  Dismount interior mirror → Chapter.
  N70-0586
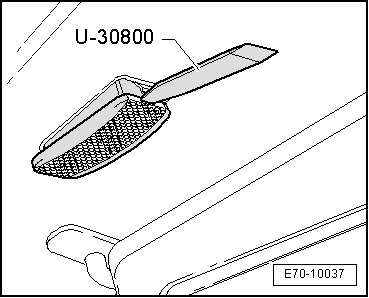
Dismount courtesy light for sunshade mirror
–  Detach the courtesy mirror lamp using the lever -U 30800-.
  E70-10037
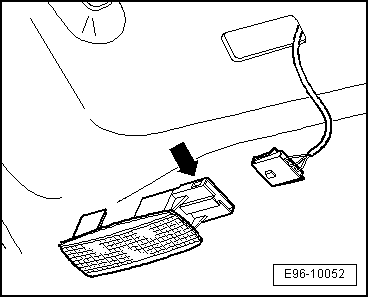
–  Unplug electrical connector -arrow-.
  E96-10052
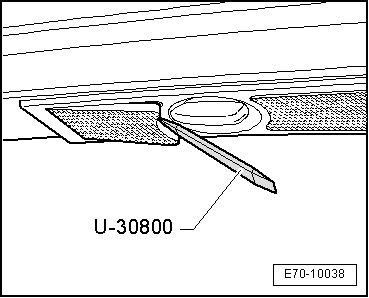
Remove rear courtesy lamp
–  Detach the courtesy lamp glass using the lever -U 30800-.
  E70-10038
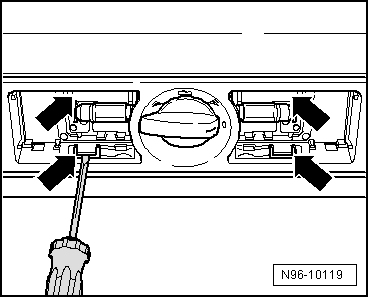
–  Undo the mountings -arrows- of the unit and remove unit.
  N96-10119
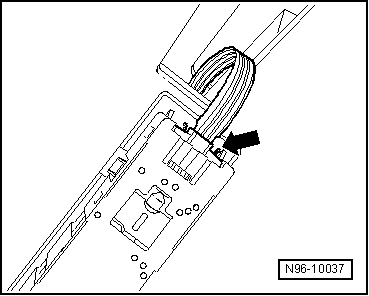
–  Separate electrical connection-arrow-.
  N96-10037
Dismount front courtesy lamp
–  Remove the unit by pressing using the lever -U 30800- on the -arrows-.
–  Separate connectors.
–  Unscrew mounting bolt from headliner → Item.
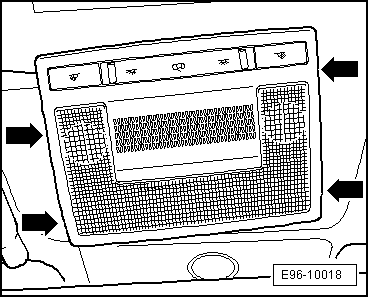
  E96-10018
–  Remove cover for interior monitoring sensor -G273--1- using lever -U 30800-.
–  Unhook retaining clip -arrows- and remove interior monitoring sensor -G273-.
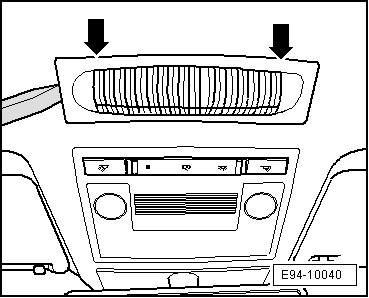
  E94-10040
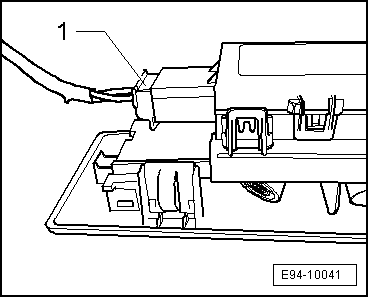
–  Disconnect electrical connector -1- and remove cover on interior monitoring sensor -G273-.
  E94-10041
Dismount sunshade and support
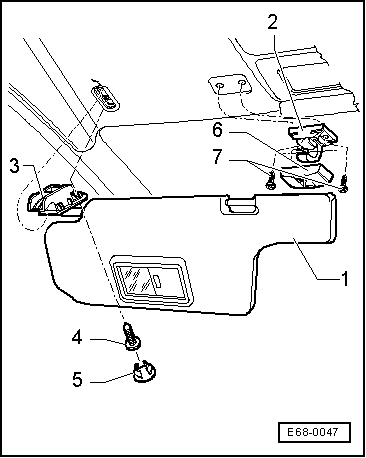
–  Unclip the sunshade -1- from the fastening -2-.
–  Remove cowling -5- using the lever -U 30800-.
–  Unscrew the bolt -4- tightening torque 2 Nm.
–  Remove fitting -3- from its housing and remove the sunshade.
–  Where applicable, disconnect the switch for the courtesy mirror light.
–  Remove cowling -6- using the lever -A 71101-.
–  Loosen bolts -7- (2x) tightening torque 2 Nm and remove fastening -2-.
–  Fold down front and rear seats
–  Loosen clips → Item from bracket using lever -T20043-.
Continue only for vehicles with power supply
–  Use the → Item lever to remove the plugs -U 30800-.
–  Unscrew the screws → Item and remove the fixing cover of the power supply → Item.
Continued for all vehicles
–  Release the roof lining and remove through the rear part out of the vehicle. Take special care that the trims do not bend.
  Note
Insert a protective device between the surface where the trim should be lent against and its contact surface to prevent the possibility of dirt entering.
  E68-0047

Roof lining, fitting > < Roof lining: removal and assembly