
Leon Mk2
| Upper B-pillar trim: Removing and installing |
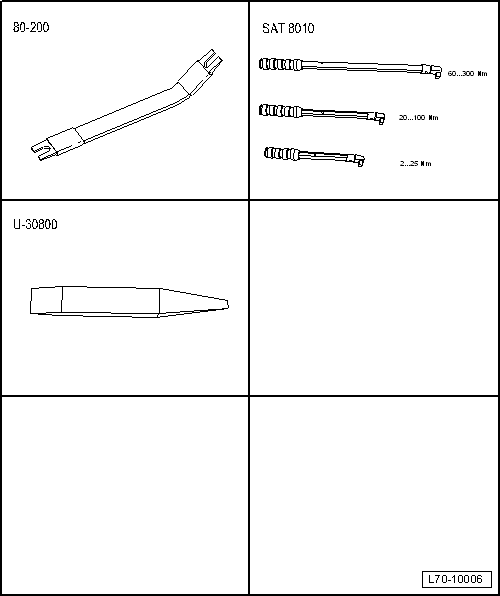
| Special tools and workshop equipment required |
| t | Lever -80 200- |
| t | Torque wrench kit -SAT 8010- |
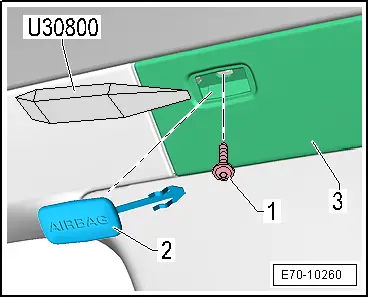
| t | Lever -U30800- |
|
 WARNING
|
|
|
|
|
|
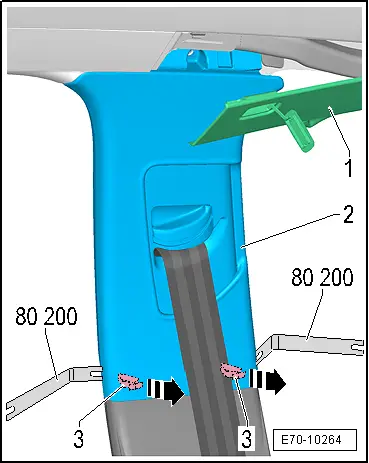
| – | Loosen both retaining collars -3- at the top of the trim -2-. |
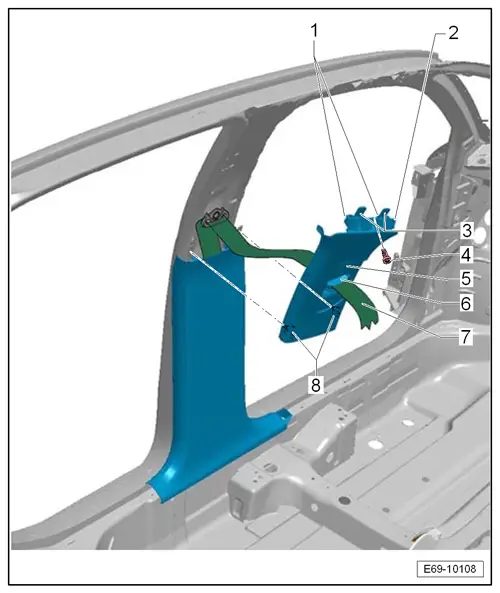
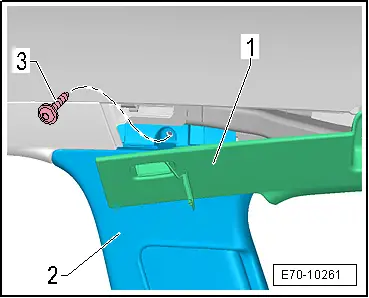
| – | Detach trim -2- vertically downwards. |
| – | Remove outer seat belt anchorage point → Chapter. |
| – | Thread belt -7- out of belt height adjuster -5-. |
|
 Caution
|
 Note
Note| Do not press button -6- when installing. |
| – | Thread belt -7- into height adjuster -5-. |
| – | Install height adjuster -5- → Fig. |
| – | Mount B-pillar trim with clips on the upper edge. Make sure both lugs -3- and two tabs -1- engage properly (correct gap width). |
| – | Fasten clips -8- at lower edge of upper B-pillar trim -2-. |
Caution
|
Note| t | Check operation after installing trim: |
| t | Belt height adjuster must engage audibly in each of the 5 possible positions (including top position). |
| t | Following actuation, button must always return automatically to top position. |
