seat Workshop Repair Guides

SEAT Workshop Service and Repair Manuals

Removing and installing D-pillar trims > < Releasing and securing C-pillar trims
Removing and installing C-pillar trims
  Note
Removal and installation are described for the left vehicle side. Follow same instructions for the right side as appropriate.
Removing
–  Switch off ignition.
–  Remove connecting piece between sill panel strip and luggage compartment trim → Chapter.
–  Remove belt end anchor from C-pillar → Chapter.
   
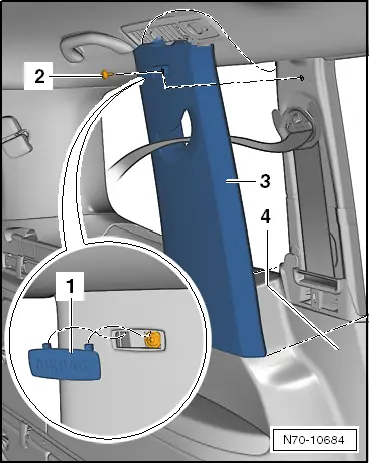
–  Carefully detach the „Airbag“ emblem.
–  Remove the screw -2- (4.5 Nm).
–  First, unclip the C-pillar trim -3- from the side wall trim -4- and then from the middle of the C-pillar.
–  Pull C-pillar trim out from under the moulded headliner.
–  Thread seat belt through trim.
Installing
–  Install in reverse order of removal.
  Note
After installation, check that trim is behind beading of door seal.
  N70-10684

Removing and installing D-pillar trims > < Releasing and securing C-pillar trims