seat Workshop Repair Guides

SEAT Workshop Service and Repair Manuals

Seat panel without height adjustment (3-door models): Assembly overview > < Seat panel with height adjustment (3-door models): Assembly overview
Seat panel with height adjustment (3-door models): Removing and installing.
   
Seat panel with height adjustment (3-door models): Removing and installing.
Special tools and workshop equipment required
t  Torque wrench kit -SAT 8010-
t  Pliers -T20065-
t  Base -T20172/1-
t  Tower -T20172/2-
t  Seat repair stand -T20172/5-

Removal:
  Caution
Always observe the procedure in the repair instructions for disconnecting and connecting the battery → Disconnecting and connecting battery; Rep. gr.27
  Note
t  Before working with the airbag system, always read the safety precautions → Chapter.
t  After connecting the battery, check the vehicle equipment (radio, clock, electric windows, etc.) following the indications in the Repair Manual and/or the Operating Instructions.
t  Before separating the activation cable and the earth cable, any build up electrostatic must be eliminated (touching the door slip switch or the bodywork)
t  The removal and installation procedures may need to be modified slightly depending on the equipment variants.
t  For ease of disassembly it is recommendable to set the seat in the highest position.
–  Disconnect the battery → Battery: disconnecting and connecting; Rep. gr.27.
–  Remove the front seat → Chapter.
  Note
Ensure that side airbag adapter -VAS 5232- remains connected during the entire removal procedure.
   
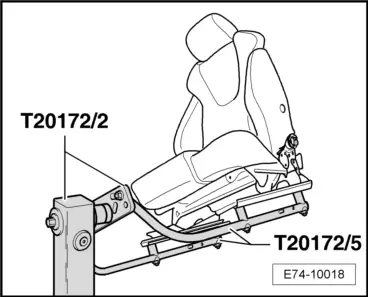
–  Clamp the front seat in the bracket for the seat repair -T20172/5-.
  E74-10018
–  Remove the seat back adjustment knob -4- using the pliers -T20065-.
–  Press retaining clip -arrow- inward with small screwdriver and remove button for height adjustment -6-.
–  Unscrew screws -5- (tightening torque 2 ± 0.2 Nm) and remove the side trim -7-.
–  Remove belt buckle for front seatbelt → Chapter.
–  Remove cover on outer backrest adjustment -3-.
–  Remove cover on inner backrest adjustment -1-.

Installation
Installation is carried out in the reverse order. When installing, note the following:
   
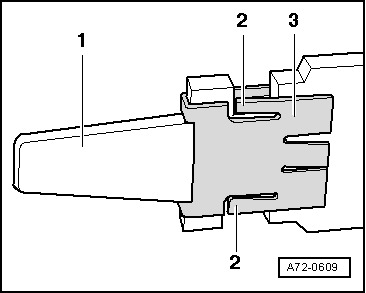
–  Make sure that the springs -2- of the securing clip -3- are resting against the outside of the lever -1-.
  A72-0609

Seat panel without height adjustment (3-door models): Assembly overview > < Seat panel with height adjustment (3-door models): Assembly overview