SEAT Workshop Service and Repair Manuals
HOME
FEATURES
MENU
INDEX
ABOUT US
Upholstery and padding for seat base (split): assembly diagram >
< Front seat back upholstery and padding: assembly diagram
Leon Mk2
Body
General body repairs, interior
Seat padding, covers
Front seat upholstery and padding / ont_seat_back_upholstery_and_padding_assembly_diagram/">Front seat back upholstery and padding: assembly diagram
Front seat upholstery and padding: removal and installation
Front seat upholstery and padding: removal and installation
Front seat upholstery and padding: removal and installation
Removal
Note!
For removal and fitting take into account some differences of equipment that may exist.
–
Removing the seat
→ Chapter
–
Removing the seat back
→ Anchor
–
Remove the safety clips
-1-
and remove the headrests
-2-
from the guides
-3-
.
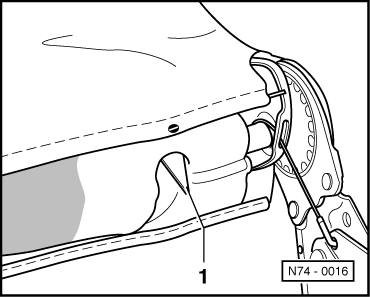
–
Bend the ends
-1-
.
–
Release the upholstery from the hooks.
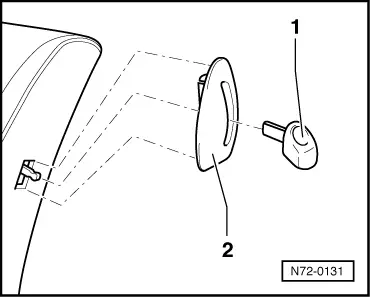
–
Remove the seat back release actioning lever
-1-
.
–
Remove the trim
-2-
.
–
Remove the upholstery pulling upwards until reaching the padding wire
-1-
.
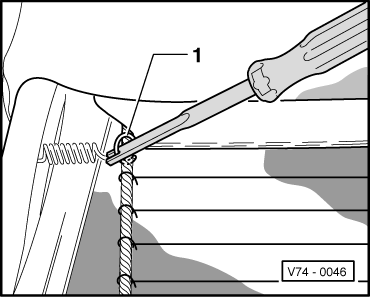
–
Unhook the padding wire
-1-
.
–
Unhook the padding wire from the front of the seat back.
–
Press the lower ends of the headrest guides
-1-
and
-2-
and remove them from the seat back frame.
–
Remove the upholstery and padding with its sliding supplement from the seat back frame.
Installation
–
Fit the sliding supplement and the padding to the seat back frame.
–
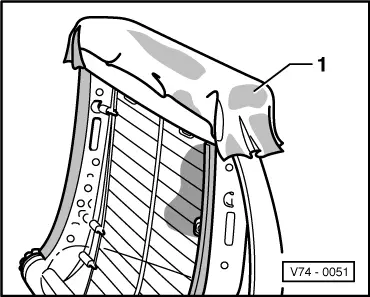
Place the piece of sliding cloth
-1-
on the top edge of the padding for easier fitting of the upholstery.
–
To aid fitting, heat the upholstery to about 30 °C.
–
Fit the upholstery and the rest of the assembly in the reverse of the dismantling procedure.
Body
General body repairs, interior
Seat padding, covers
Front seat upholstery and padding / ont_seat_back_upholstery_and_padding_assembly_diagram/">Front seat back upholstery and padding: assembly diagram
Front seat upholstery and padding: removal and installation
Upholstery and padding for seat base (split): assembly diagram >
< Front seat back upholstery and padding: assembly diagram
 Note!
Note!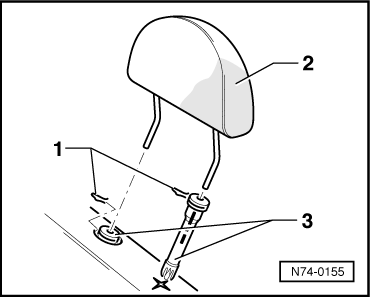
 Note!
Note!