seat Workshop Repair Guides

SEAT Workshop Service and Repair Manuals

Cover and padding for the continuous rear bench seat: Assembly overview > < Upholstery and padding for the split rear bench seat: Assembly overview
Upholstery and padding for the split rear bench seat: Removing and installing.
Special tools and workshop equipment required
   
t  Release lever -U 30800-
  W00-2169
  Note
Removal and installation is described for the left seat. Apply the same instructions for removal and installation of right seat components as appropriate.
Removal:
–  Remove rear bench seat:
t  1/3 seat bench, left side → Chapter.
t  2/3 seat bench, right side → Chapter.
–  Unhook channels on cover from seat frame cover on bottom side of seat frame.
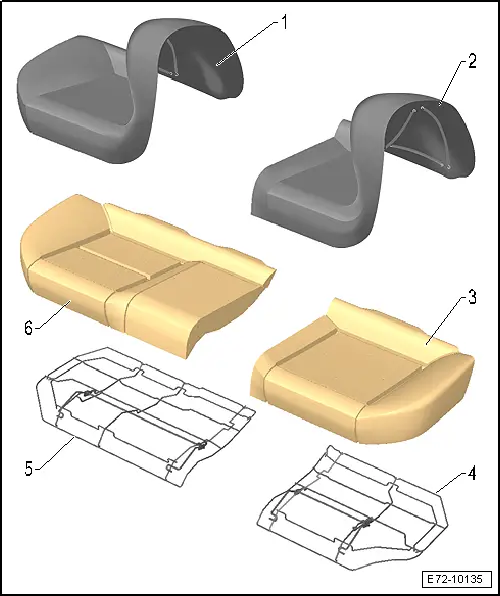
–  Remove the the cover from the hook-and-loop fastener and remove the cover -2- from the padding -3-.

Installation
Installation is carried out in reverse order.
   

Cover and padding for the continuous rear bench seat: Assembly overview > < Upholstery and padding for the split rear bench seat: Assembly overview