
Leon Mk2
| Rear lock carrier trim, ST models: assembly overview Removing and installing. |
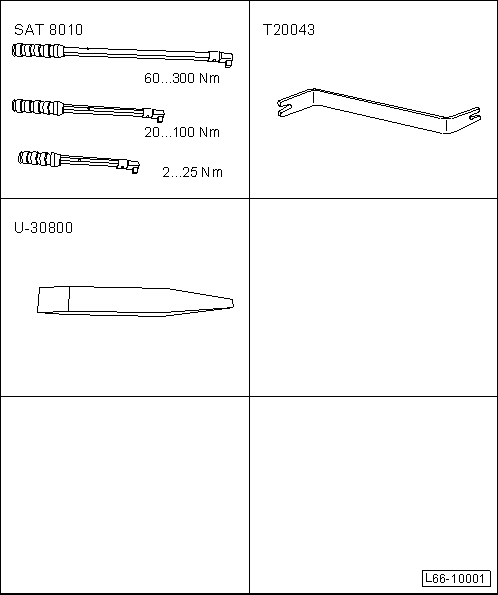
| Special tools and workshop equipment required |
| t | Torque wrench kit -SAT 8010- |
| t | Release lever -T20043- |
| t | Release lever -U 30800- |
| Removal: |
| – | Open the tailgate. |
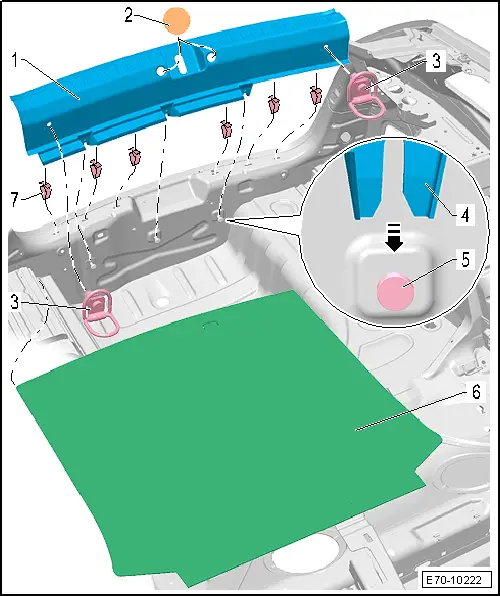
| – | Remove the luggage compartment floor carpet in -6-. |
| – | Remove fastening hooks -3-. |
| – | Press the rubber lip of the tailgate to the side and apply the lever -T20043- between the rubber and lining of the lock carrier to the first clip -7-. |
| – | Use the lever, -T20043- to detach the first clip upwards. |
| – | Repeat the same process on the remaining clips -7- and remove the lining of the rear lock carrier upwards. |
 Note
Note
|