Leon Mk2
| Front wing: dismantling and fitting |
| Dismantling |
| – | Dismounting the front bumper → Chapter, Front bumper; Assembly overview |
| – | Remove separation element → Chapter, Separation element: dismantling and fitting |
| – | Remove the front and lateral indicator → Electrical systems; Rep. Gr.94 |
| – | Rmoving radio aerial (only on left wing): → Radio, Telephone, Navigation system; Rep. Gr.91 |
| – | Remove front lining and front spoiler → Chapter, Lock carrier with moving components: dismantling and fitting |
| – | Remove the securing screws from the lock carrier on the corresponding wing |
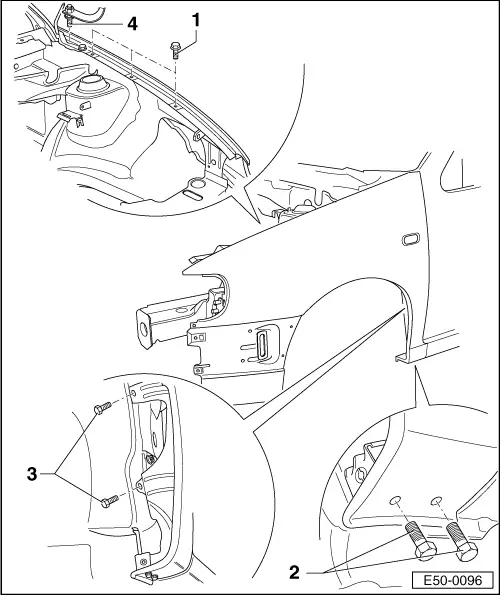
| – | Remove the hexagon bolts -1- |
| – | Remove the nut from the rear securing screw -4- and remove the earth cable |
| – | Remove the rear securing screw -4- from the bonnet hinge |
| – | Free the securing screws -2- and -3- from the underside protection and remove them |
| – | Heat wing at the contacts points with strut A with hot air heater -SAT 1416- ( if required, separate the PVC with an upholstery knife) |
 Note!
Note!| The PVC can only be lightly heated and for a short time The PVC should not change colour or form bubbles |
| Installation |
| – | Before screwing in the wing, an intermediate layer of zinc -KR 004 30903- must be applied to the contact areas for the screws |
| – | Place the underside PVC -KR 004 30603- in the areas which had separated said protection, using the putty applicator gun -SAT 5380- |

