seat Workshop Repair Guides

SEAT Workshop Service and Repair Manuals

Removal and installation of Haldex clutch, Alhambra?2011?? > < Removing Haldex coupling
Installing Haldex coupling
Installation is carried out in the reverse sequence; note the following:
   
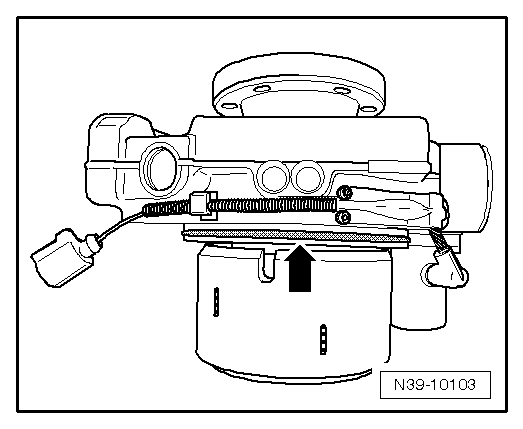
–  Install a new O-ring -arrow- and lightly oil it with high performance oil for Haldex clutches → Spare parts catalogue.
  Caution
The O-ring can be damaged during assembly. The clutch should be handled with care to ensure that it fits correctly.
  N39-10103
–  Insert Haldex coupling in rear final drive.
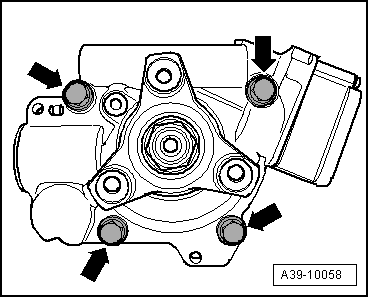
–  Tighten bolts -arrows- to specified torque → Anchor.
  A39-10058
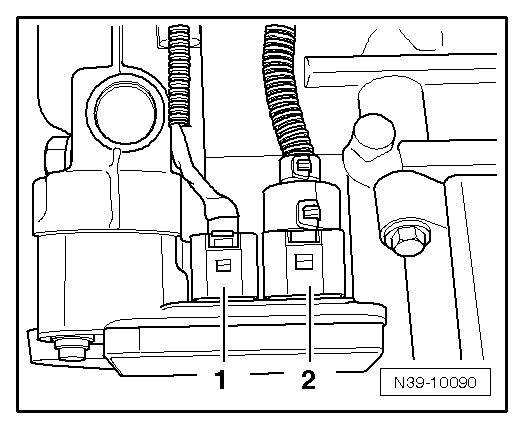
–  Connect the connector -2- to the four-wheel drive control unit -J492-.
–  Couple the cardan shaft rear part:
t  Propshaft, Altea XL 2009 ►, Altea XL Freetrack 2008 ►, Altea XL Freetrack 2009 ► → Chapter.
–  Install the exhaust system and then align without tensioning → Rep. gr.26.
–  Add high performance oil for Haldex clutches → Spare parts catalogue once more and check the oil level.
t  Oil level of Haldex coupling (2nd Generation), check and, top up where applicable, Altea XL 2009 ►, Altea XL Freetrack 2008 ►, Altea XL Freetrack 2009 ► → Chapter.
t  Check oil level in Haldex coupling (4th Generation), check and, top up where applicable, Altea XL 2009 ►, Altea XL Freetrack 2008 ►, Altea XL Freetrack 2009 ►, Alhambra 2011 ► → Chapter.
Tightening torque
  N39-10090
Component Nm
Haldex Clutch to the rear final group50


Removal and installation of Haldex clutch, Alhambra?2011?? > < Removing Haldex coupling