
Fabia Mk2
| Oil filter holder - Summary of components |

| 1 - | Screw cap - 25 Nm |
| q | slacken and tighten with oil filter wrench -3417- |
| 2 - | O-ring |
| q | replace |
| 3 - | O-ring |
| q | replace |
| 4 - | O-ring |
| q | replace |
| 5 - | Oil filter element |
| q | pull off cap (Pos. 1) |
| q | when replacing the oil filter element, replace O-rings (Pos. 2, 3 and 4) |
| q | Check fitting position |
| q | Pay attention to change intervals: |
| t | → BookletFabia II |
| t | → BookletRoomster |
| t | → BookletOctavia II |
| t | → BookletSuperb II |
| t | → BookletYeti |
| t | → BookletRapid |
| 6 - | Engine oil cooler |
| q | Connection diagram for coolant hoses: |
| t | Fabia II up to 05.10, Roomster as of 05.10 → Chapter |
| t | Fabia II as of 06.10, Roomster as of 06.10, Rapid → Chapter |
| t | Octavia II → Chapter |
| t | Superb II, Yeti → Chapter |
| 7 - | 11 Nm |
| 8 - | Gasket |
| q | replace |
| 9 - | 15 Nm + torque a further 90° (1/4 turn) |
| q | replace |
| q | tighten crosswise |
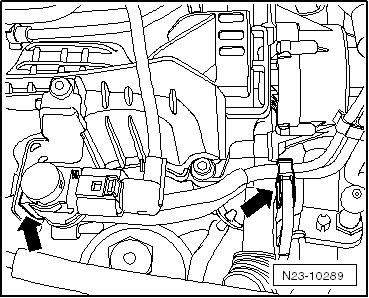
| 10 - | Oil filter holder |
| 11 - | Gasket |
| q | replace |
 Note
Note
|
|
|
Note
|
|
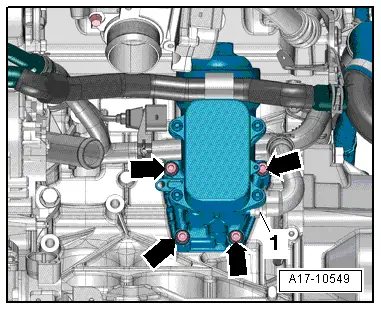
| Stage | Screws | Torque/torquing angle |
| 1. | -Arrows- | 14 Nm |
| 2. | -Arrows- | 180° (1/2 turn) |
|

|