| –
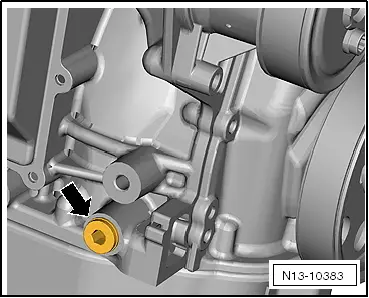
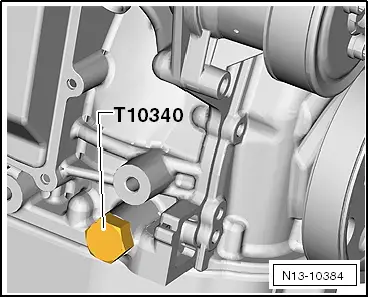
| Turn the fixing screw -T10340- up to the stop in the cylinder block. |

Caution | If the fixing screw -T10340 - cannot be screwed in up to the stop, the crankshaft is not in the correct position! |
| In this case proceed as described below. |
|
| –
| Unscrew the fixing screw. |
| –
| Turn crankshaft 90° (1/4 turn) in direction of rotation of engine. |
| –
| Turn the fixing screw -T10340- up to the stop in the cylinder block. |
| –
| Tighten fixing screw -T10340- to 30 Nm. |
| –
| Turn crankshaft up to the stop in direction of rotation of engine. |
| The crankshaft is locked in direction of rotation of engine with the fixing screw -T10340-. |
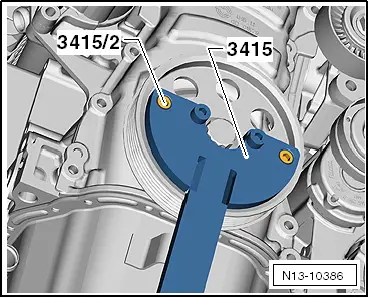
Caution | Absolutely use the counterholder -T30004 (3415)- with bolt -T30004/2 (3415/2)- when tightening the fixing screw of the belt pulley in order to avoid damage to the fixing screw. |
|
| –
| Counterhold belt pulley with counterholder -T30004 (3415)- with bolt -T30004/2 (3415/2)- and tighten fixing screw for belt pulley. |
| Tightening torque: 150 Nm + torque a further 1/2 turn (180°) |
|
|
|
 Note
Note