skoda Workshop Repair Guides

Skoda Workshop Service and Repair Manuals

Self-adhesive foils Octavia RS - WRC > < Summary of the components - for the complete rear spoiler
Removing and installing complete rear spoiler
Special tools and workshop equipment required
t  4 pin screws (approximately 15 mm long, sharply grinded at tip)
t  Drill Ø 6 mm
t  Cutting wire with holder
t  Adhesive cement -Terostat 9120- - white part no. HHA 381 013
t  Universal cleaning solution part no. HHA 381 011
Removing the spoiler
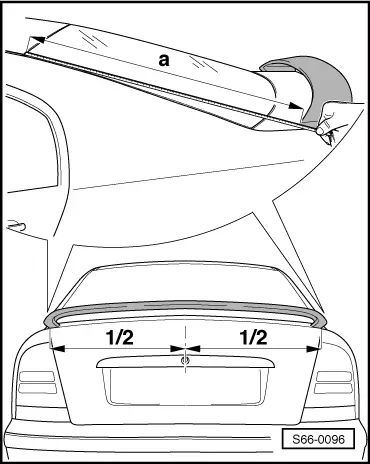
–  Unscrew fixing screws from spoiler.
–  Cut off the spoiler from the tailgate (cut through the adhesive cement).
–  Remove the spoiler.
Installing the spoiler
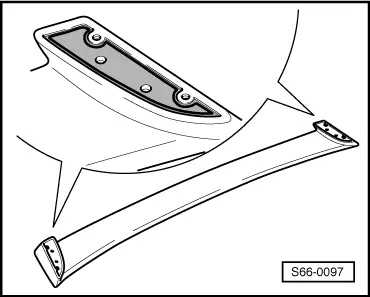
–  Screw the pin screws into the spoiler.
   
–  Position the spoiler in the specified position:
   a = 867 mm (measured from the window edge to the spoiler edge)
–  Centre the spoiler on the tailgate.
–  Press the spoiler evenly, until pin screw tips are pressed off in the paintwork.
–  Remove spoiler from the tailgate and make holes for screws on the points marked by the pin screws in the spoiler.
–  Remove pin screws.
–  Clean holes and protect against corrosion.
–  Clean the seating area of the spoiler as well as the tailgate with universal cleaning agent while observing the instructions for the adhesive cement issued by the manufacturer.
  S66-0096
–  Apply the adhesive cement all around the coloured spoiler surface while observing the instructions issued by the manufacturer.
–  Push the spoiler onto the tailgate and install the fixing screws (5 Nm).
–  Remove any dirt present using a cleaner.
  Note
t  The adhesive cement must dry for 2 hours. Do not drive the vehicle in this time.
t  Do not drive into the carwash within 24 hours of gluing on the spoiler.
  S66-0097

Self-adhesive foils Octavia RS - WRC > < Summary of the components - for the complete rear spoiler