
Octavia Mk1
 Note
Note
|

| 1 - | Spring cap |
| t | to remove push against pressure spring and turn 90° |
| 2 - | Pressure spring |
| 3 - | Locating spring |
| 4 - | Pressure rod |
| t | Coat the points of contact with solid lubricant paste -G 000 650- (e.g. Wolfrakote Top Paste) |
| 5 - | Wedge |
| t | when removing and installing the brake drum push up through a hole for wheel screw → Chapter |
| 6 - | Wheel-brake cylinder |
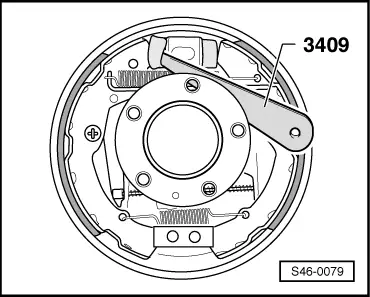
| t | Check tightness → Fig. |
| t | Repairs not allowed |
| t | removing: |
| – | Insert brake pedal load. |
| – | Unscrew brake hose. |
| – | Remove wheel-brake cylinder. |
| t | Installing: |
| – | Install wheel-brake cylinder. |
| – | Screw on brake pipe. |
| – | Take out brake pedal load. |
| – | Bleeding Brake System → Chapter. |
| 7 - | 8 Nm |
| 8 - | Tensioning sleeve |
| 9 - | Brake carrier |
| 10 - | Cap |
| t | remove to check brake pad thickness → Fig. |
| 11 - | Brake shoe |
| t | Observe the instructions for changing the brake shoe → Chapter |
| t | removing and installing → Chapter |
| t | Minimum pad thickness without supporting shoe 2.5 mm |
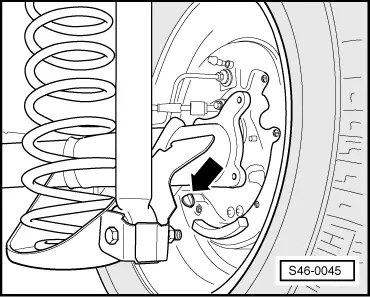
| t | Check thickness → Fig., visual inspection through the inspection hole in the brake carrier, if necessary → BookletOctavia |
| t | Always replace brake pads axle-wise |
| 12 - | Tension spring |
| 13 - | Bottom retractor spring |
| t | Coat the contact points with solid lubricant paste -G 000 650- |
| 14 - | Top retractor spring |
| 15 - | Brake shoe with lever for hand-brake |
| t | Observe the instructions for changing the brake shoe → Chapter |
| t | removing and installing → Chapter |
| t | Setting the hand-brake → Chapter |
Note
|
|